🏗️ Aroeira
Planning insulation, wall renovation, tiling and conversion
📍 Charneca da Caparita, LisbonProject structure
1st façade
Plaster renovation, filling cracks, ETICS insulation (EPS) on side walls + front wall Lawn · Front and rear only painted
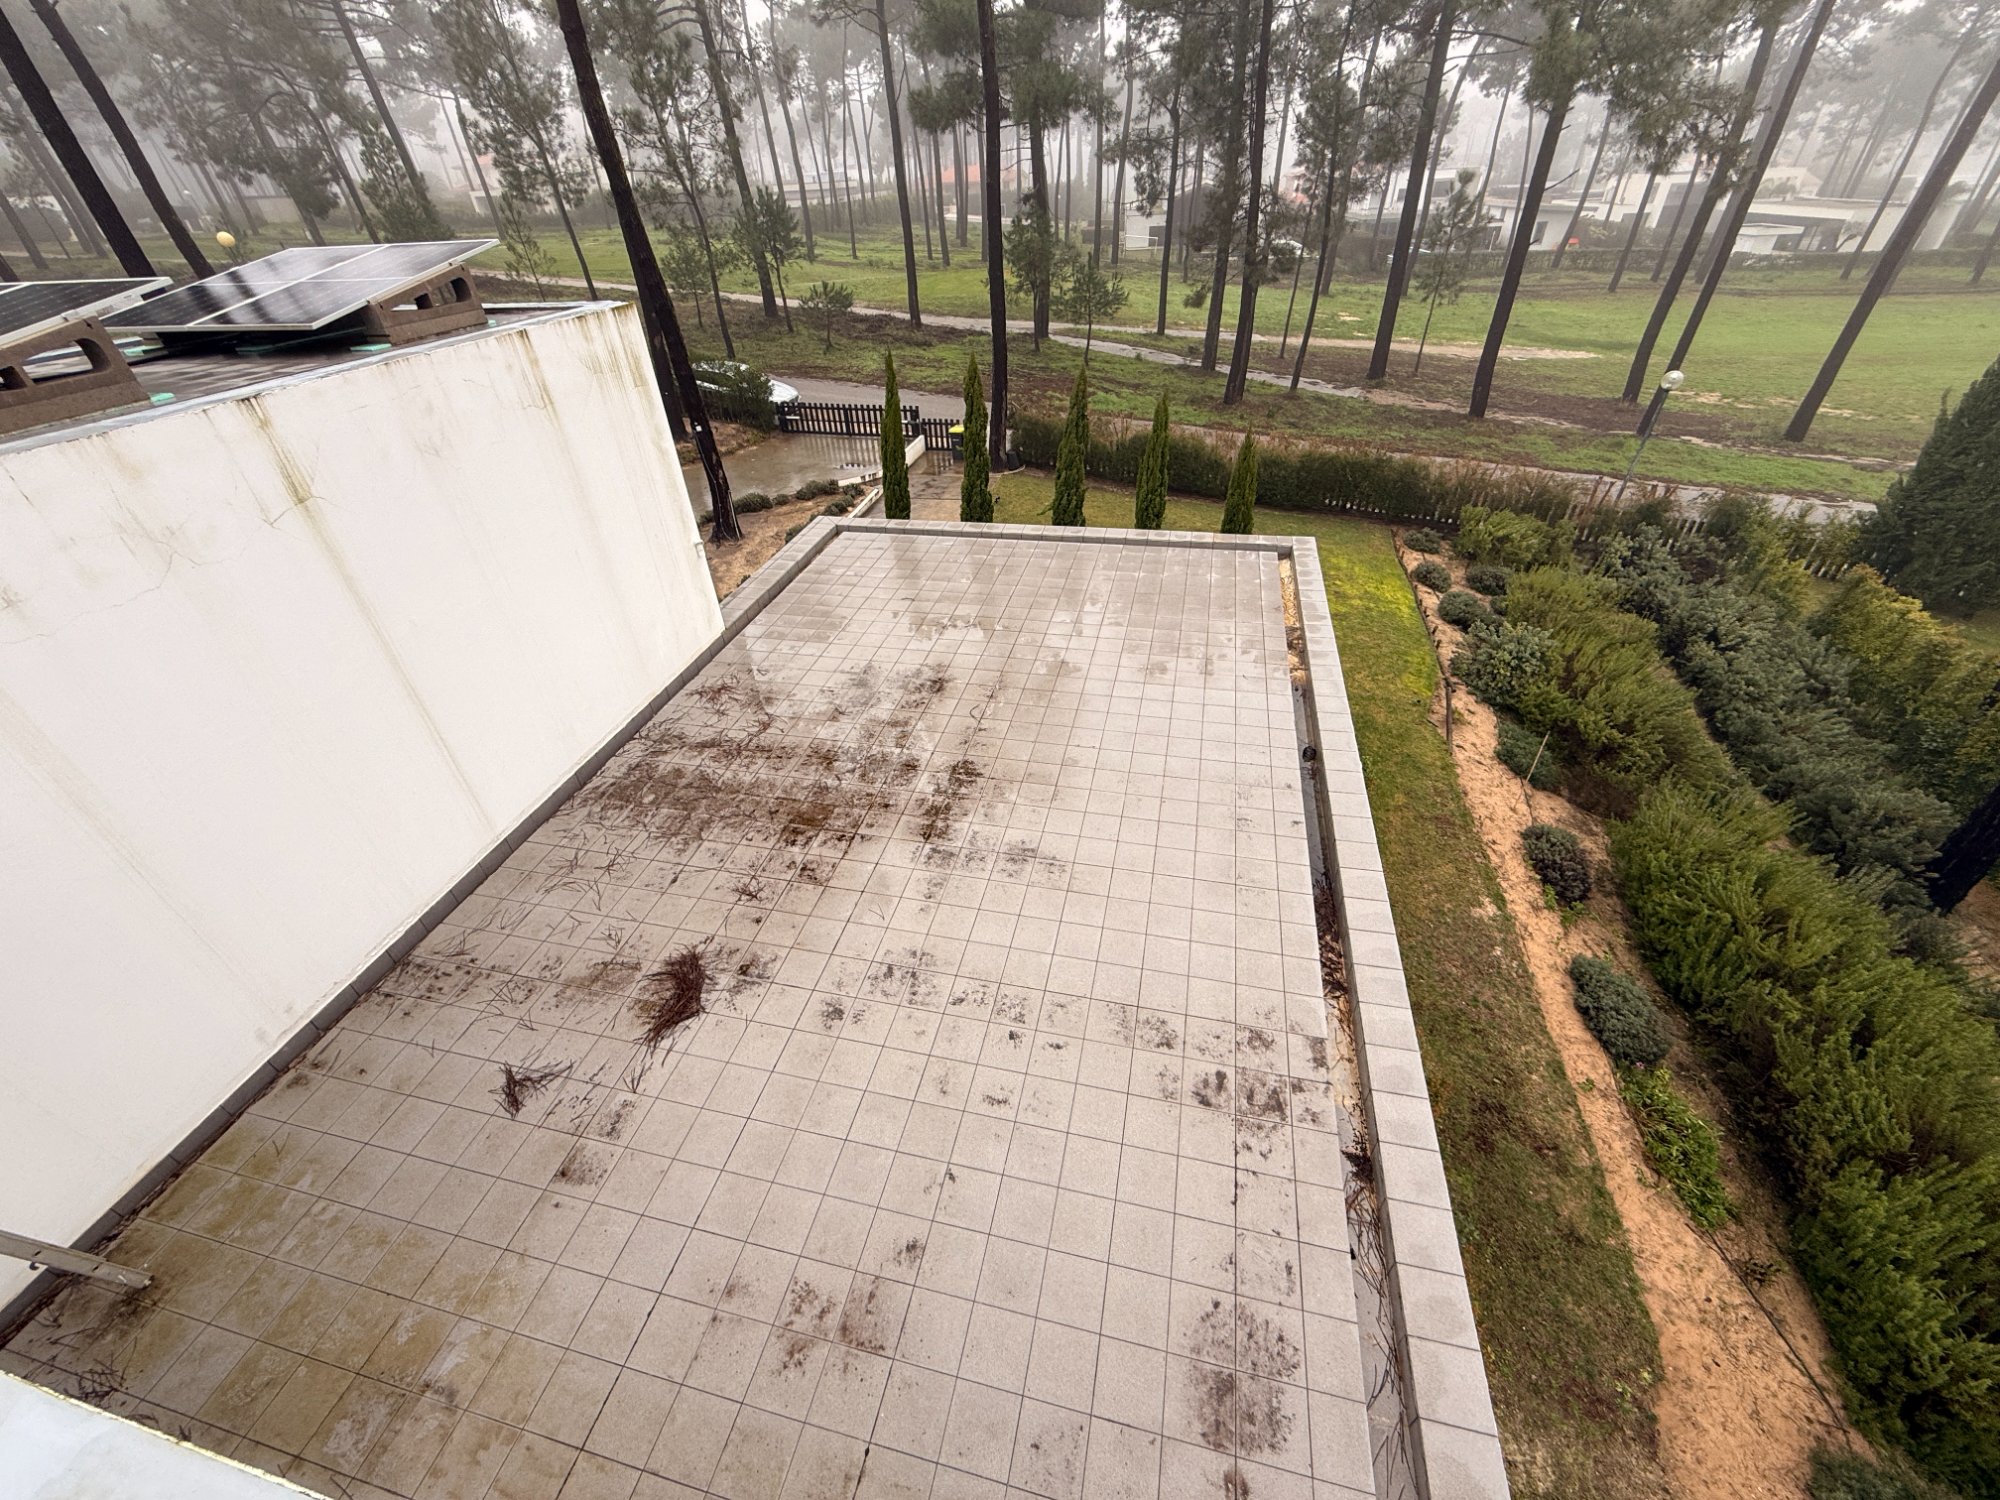
2. Roof
Surface strip-back and reconstruction of roof including waterproofing
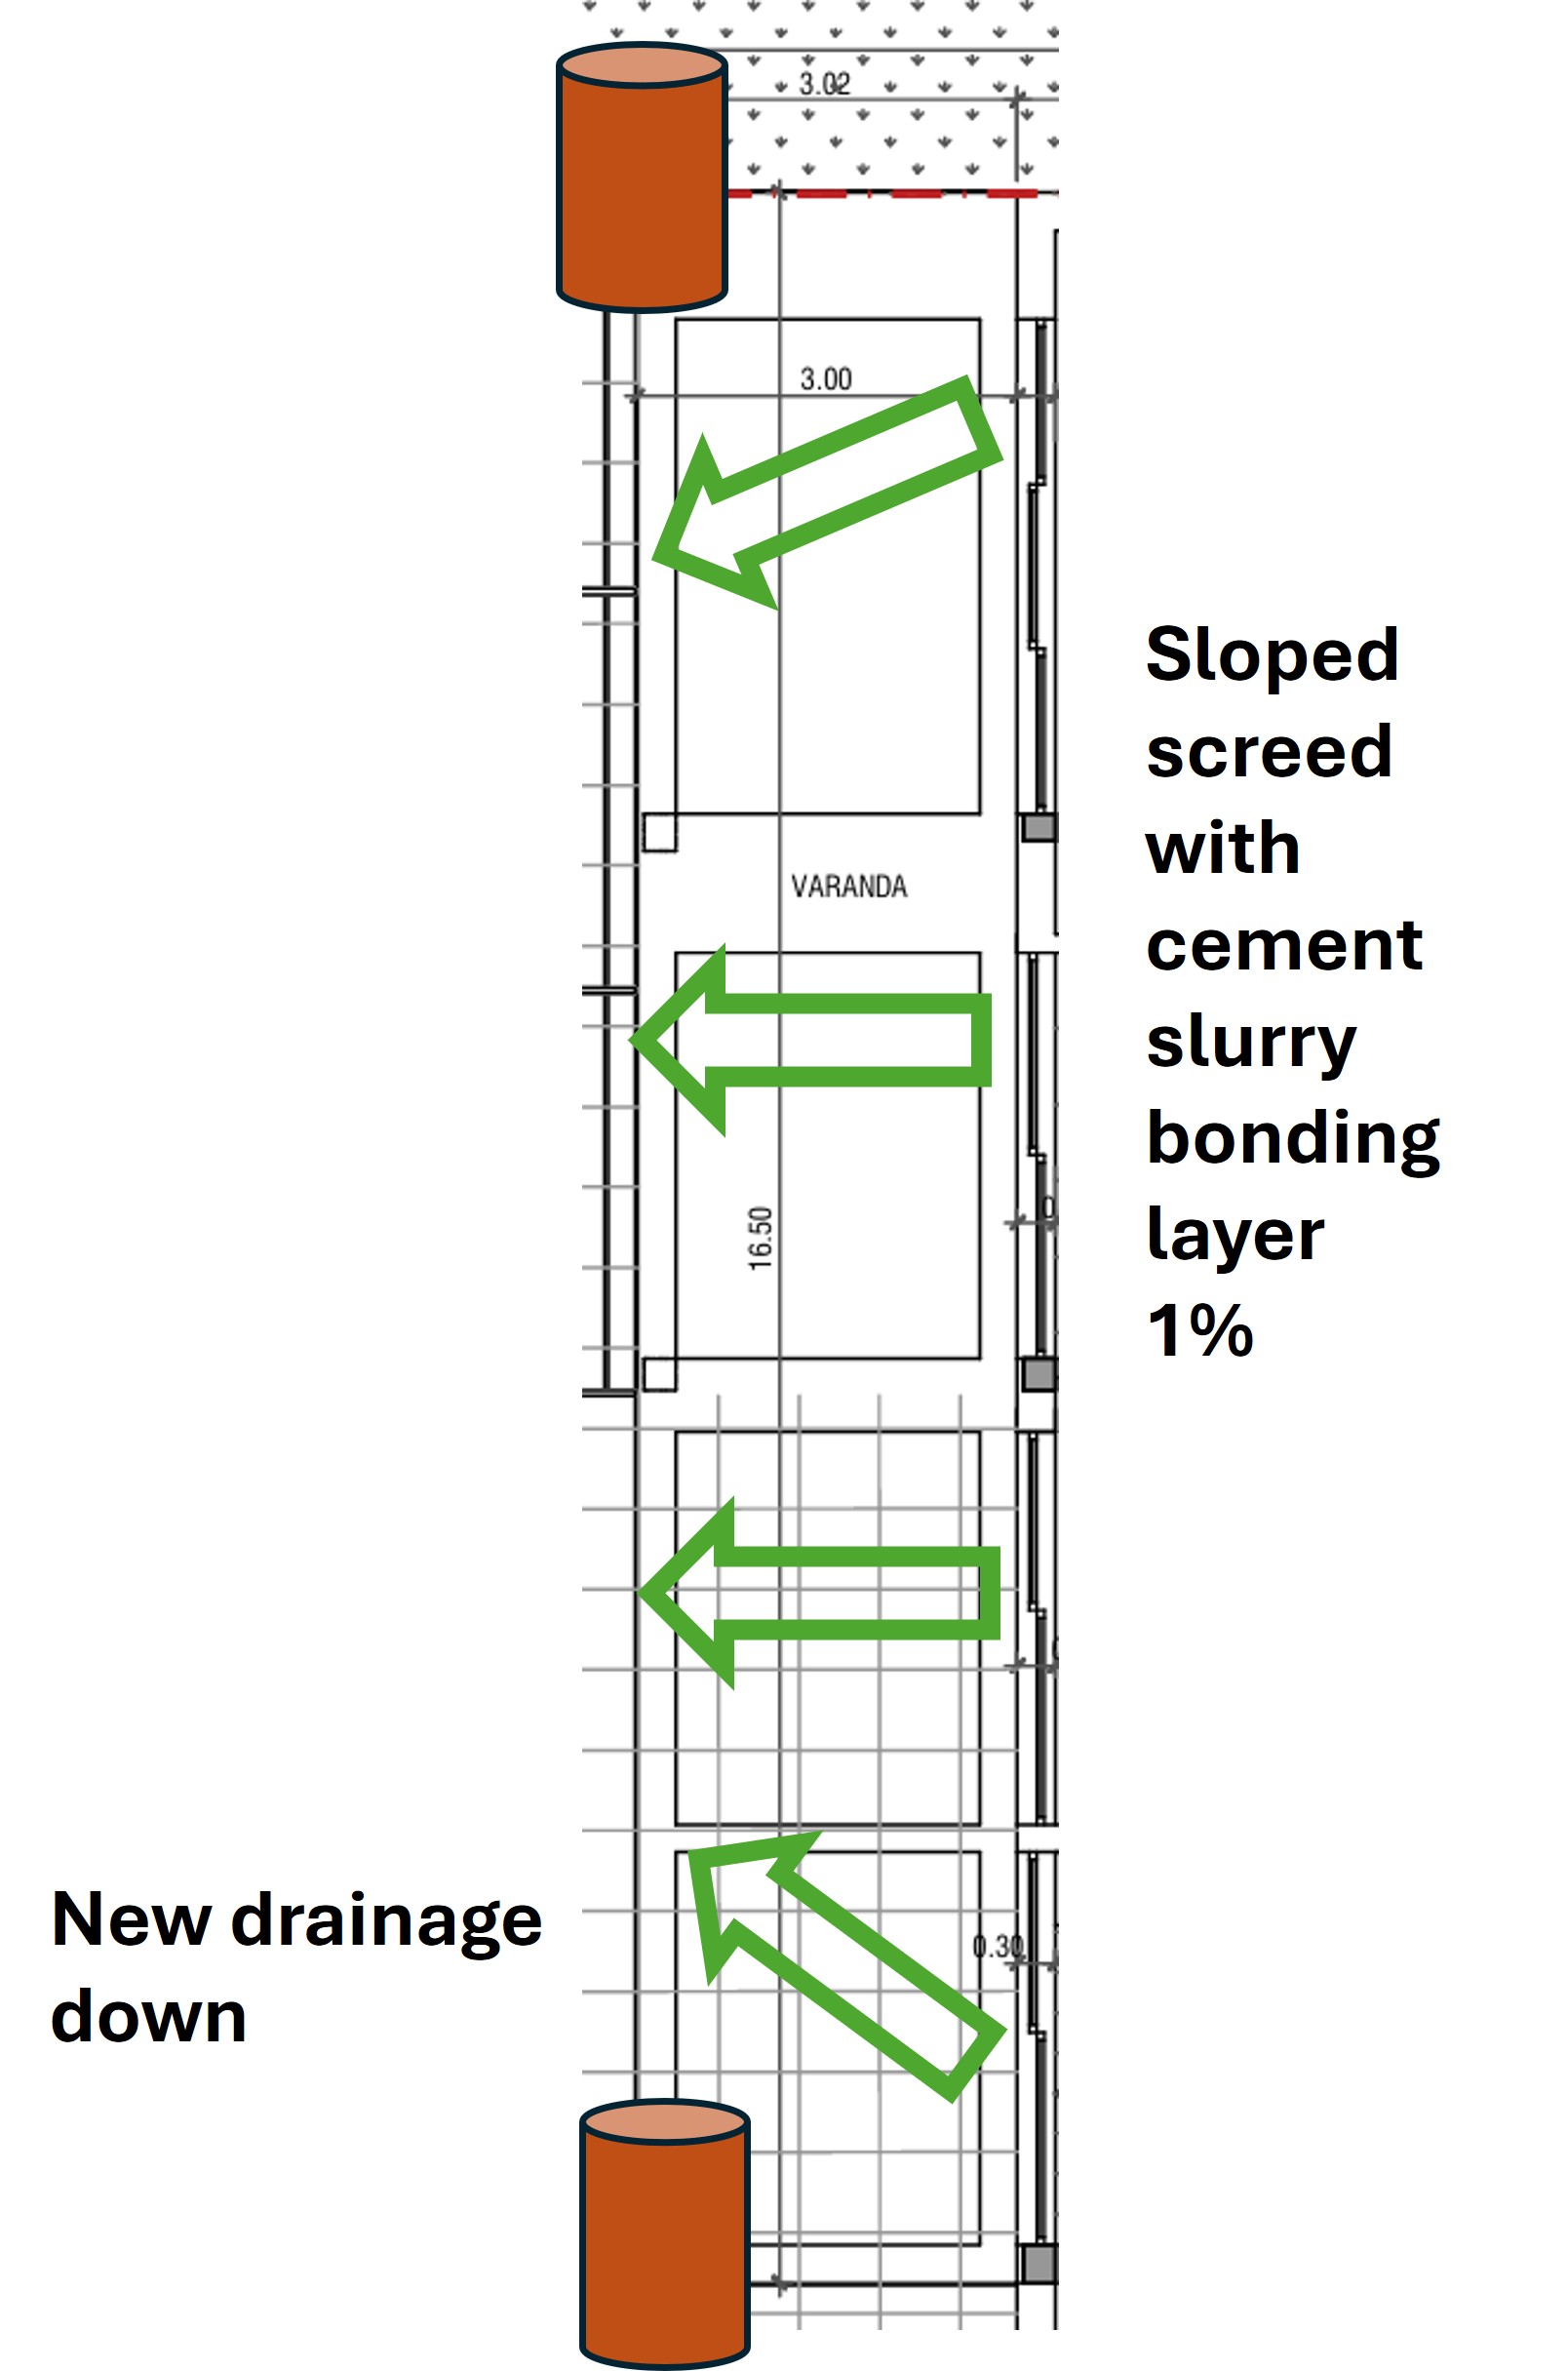
3. Balconies
Surface strip-back and reconstruction of 4 balcony areas (1st floor) including waterproofing
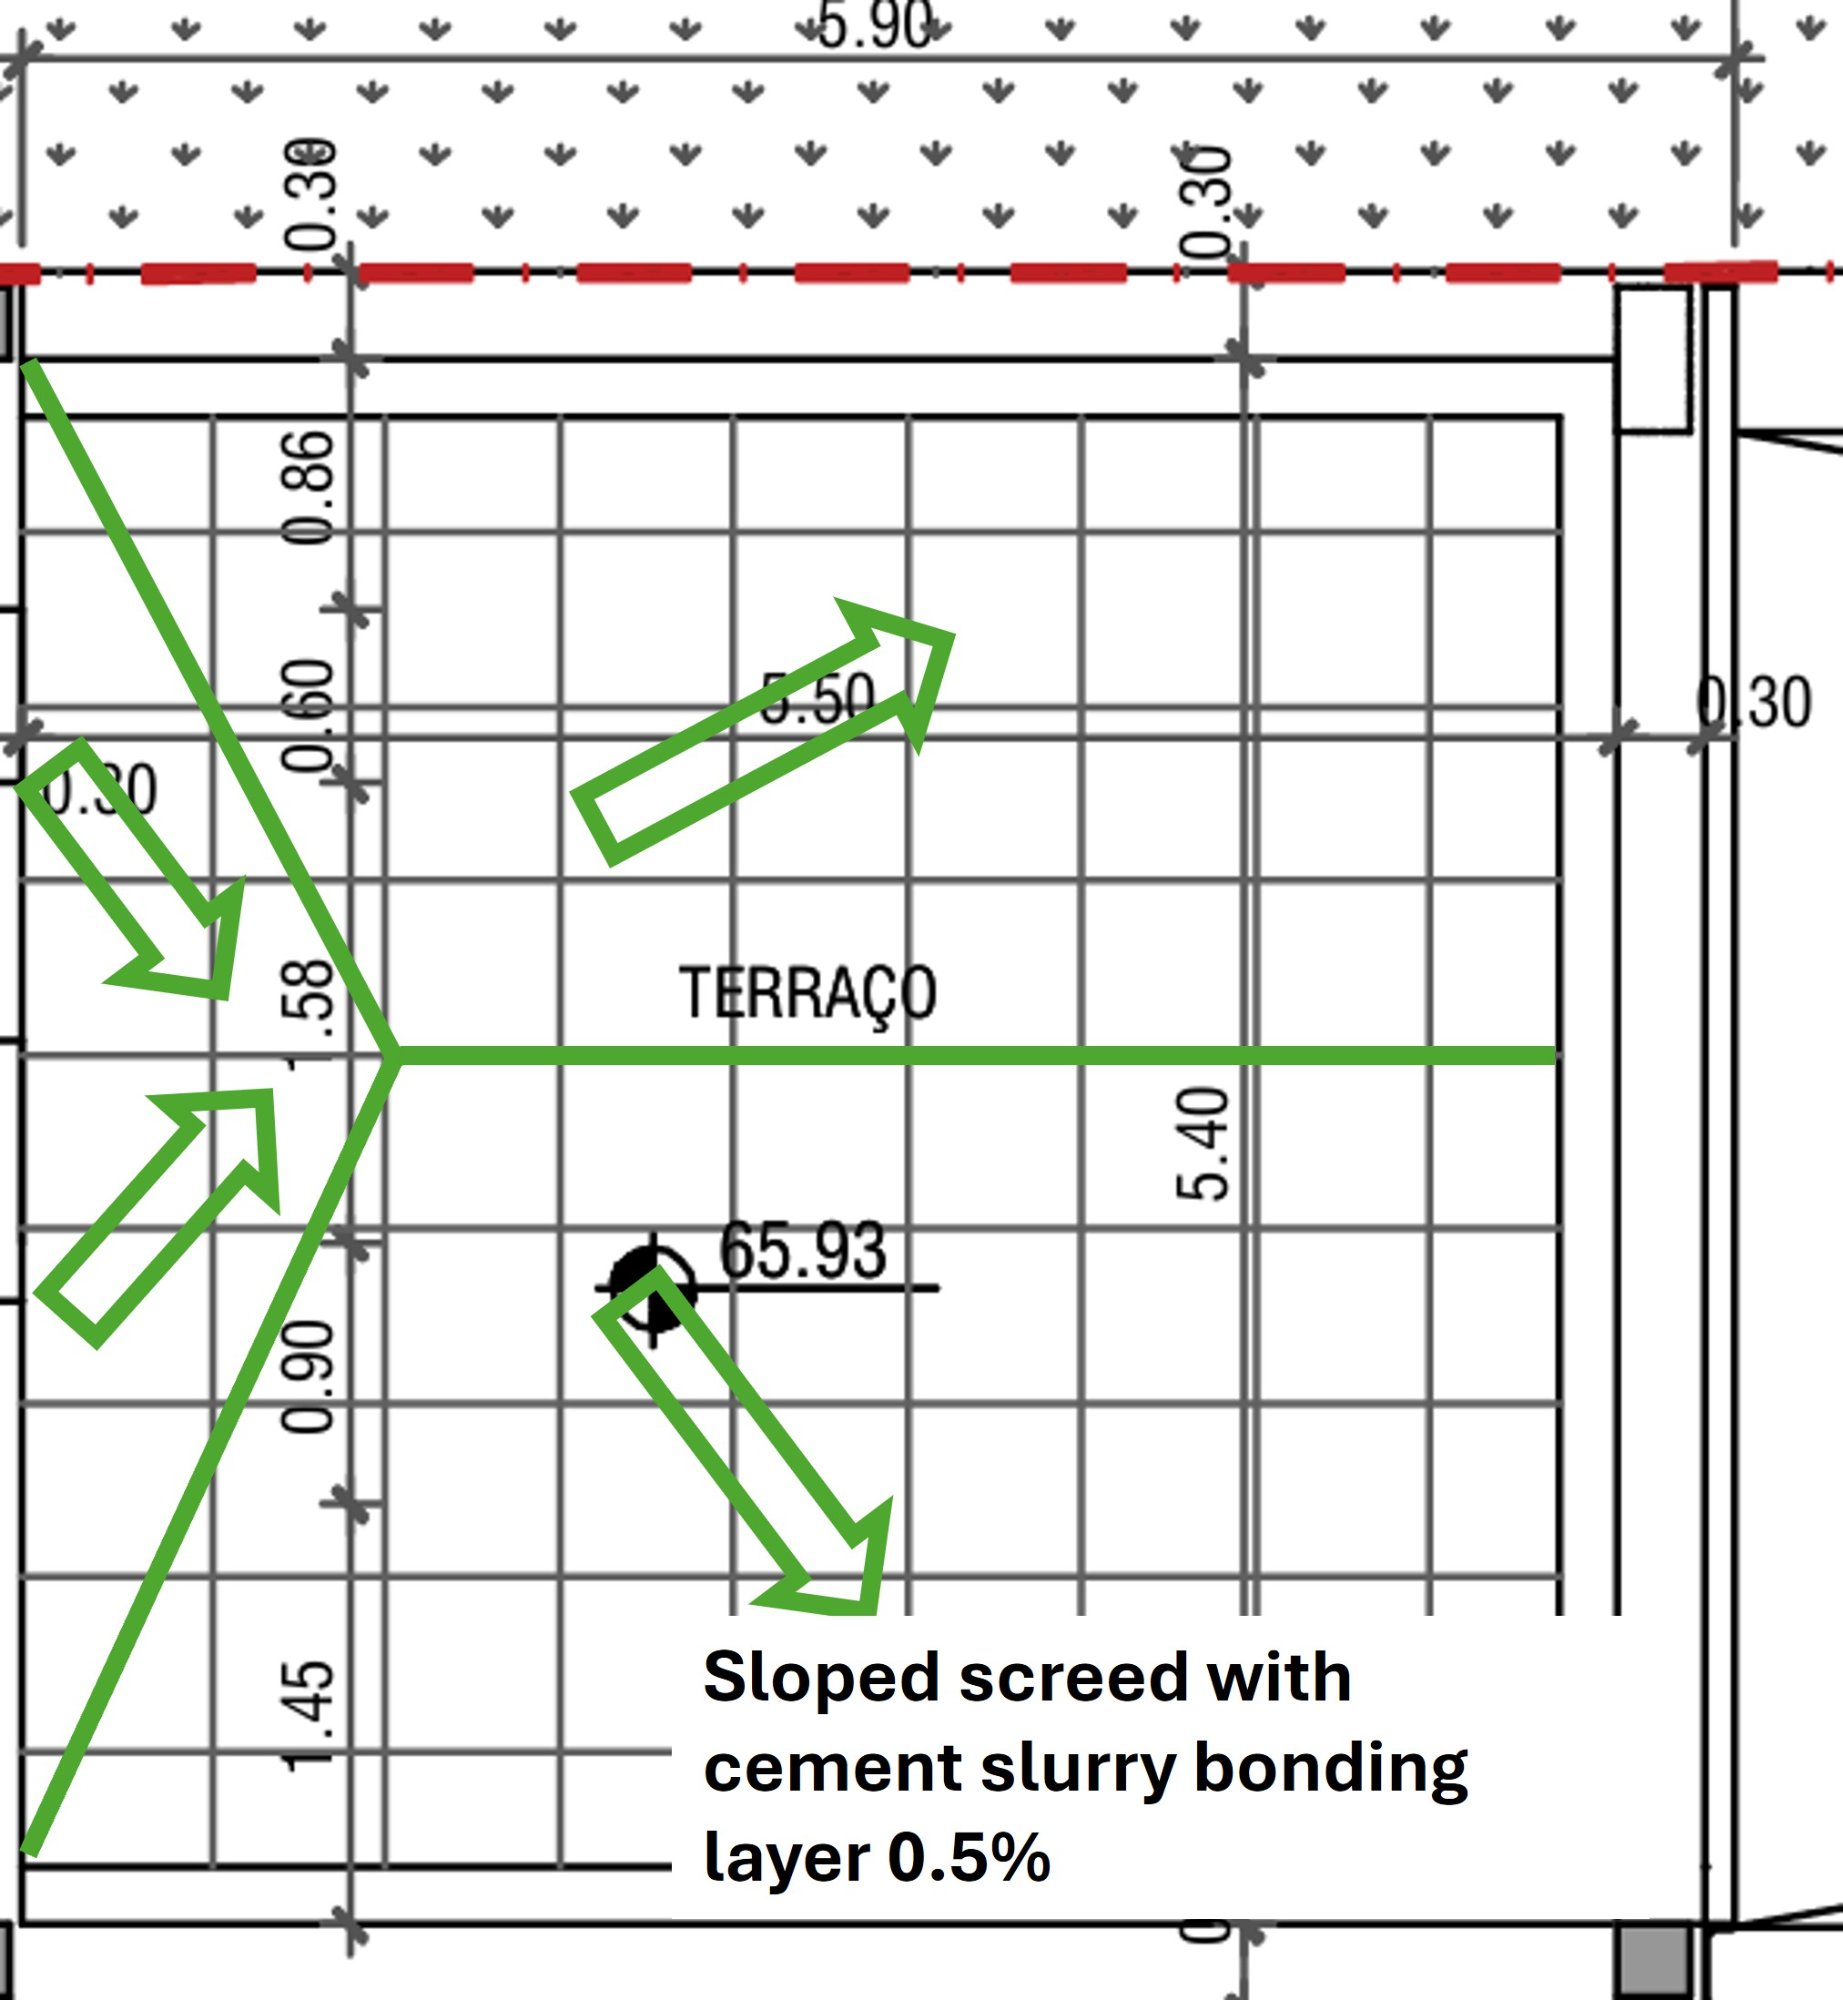
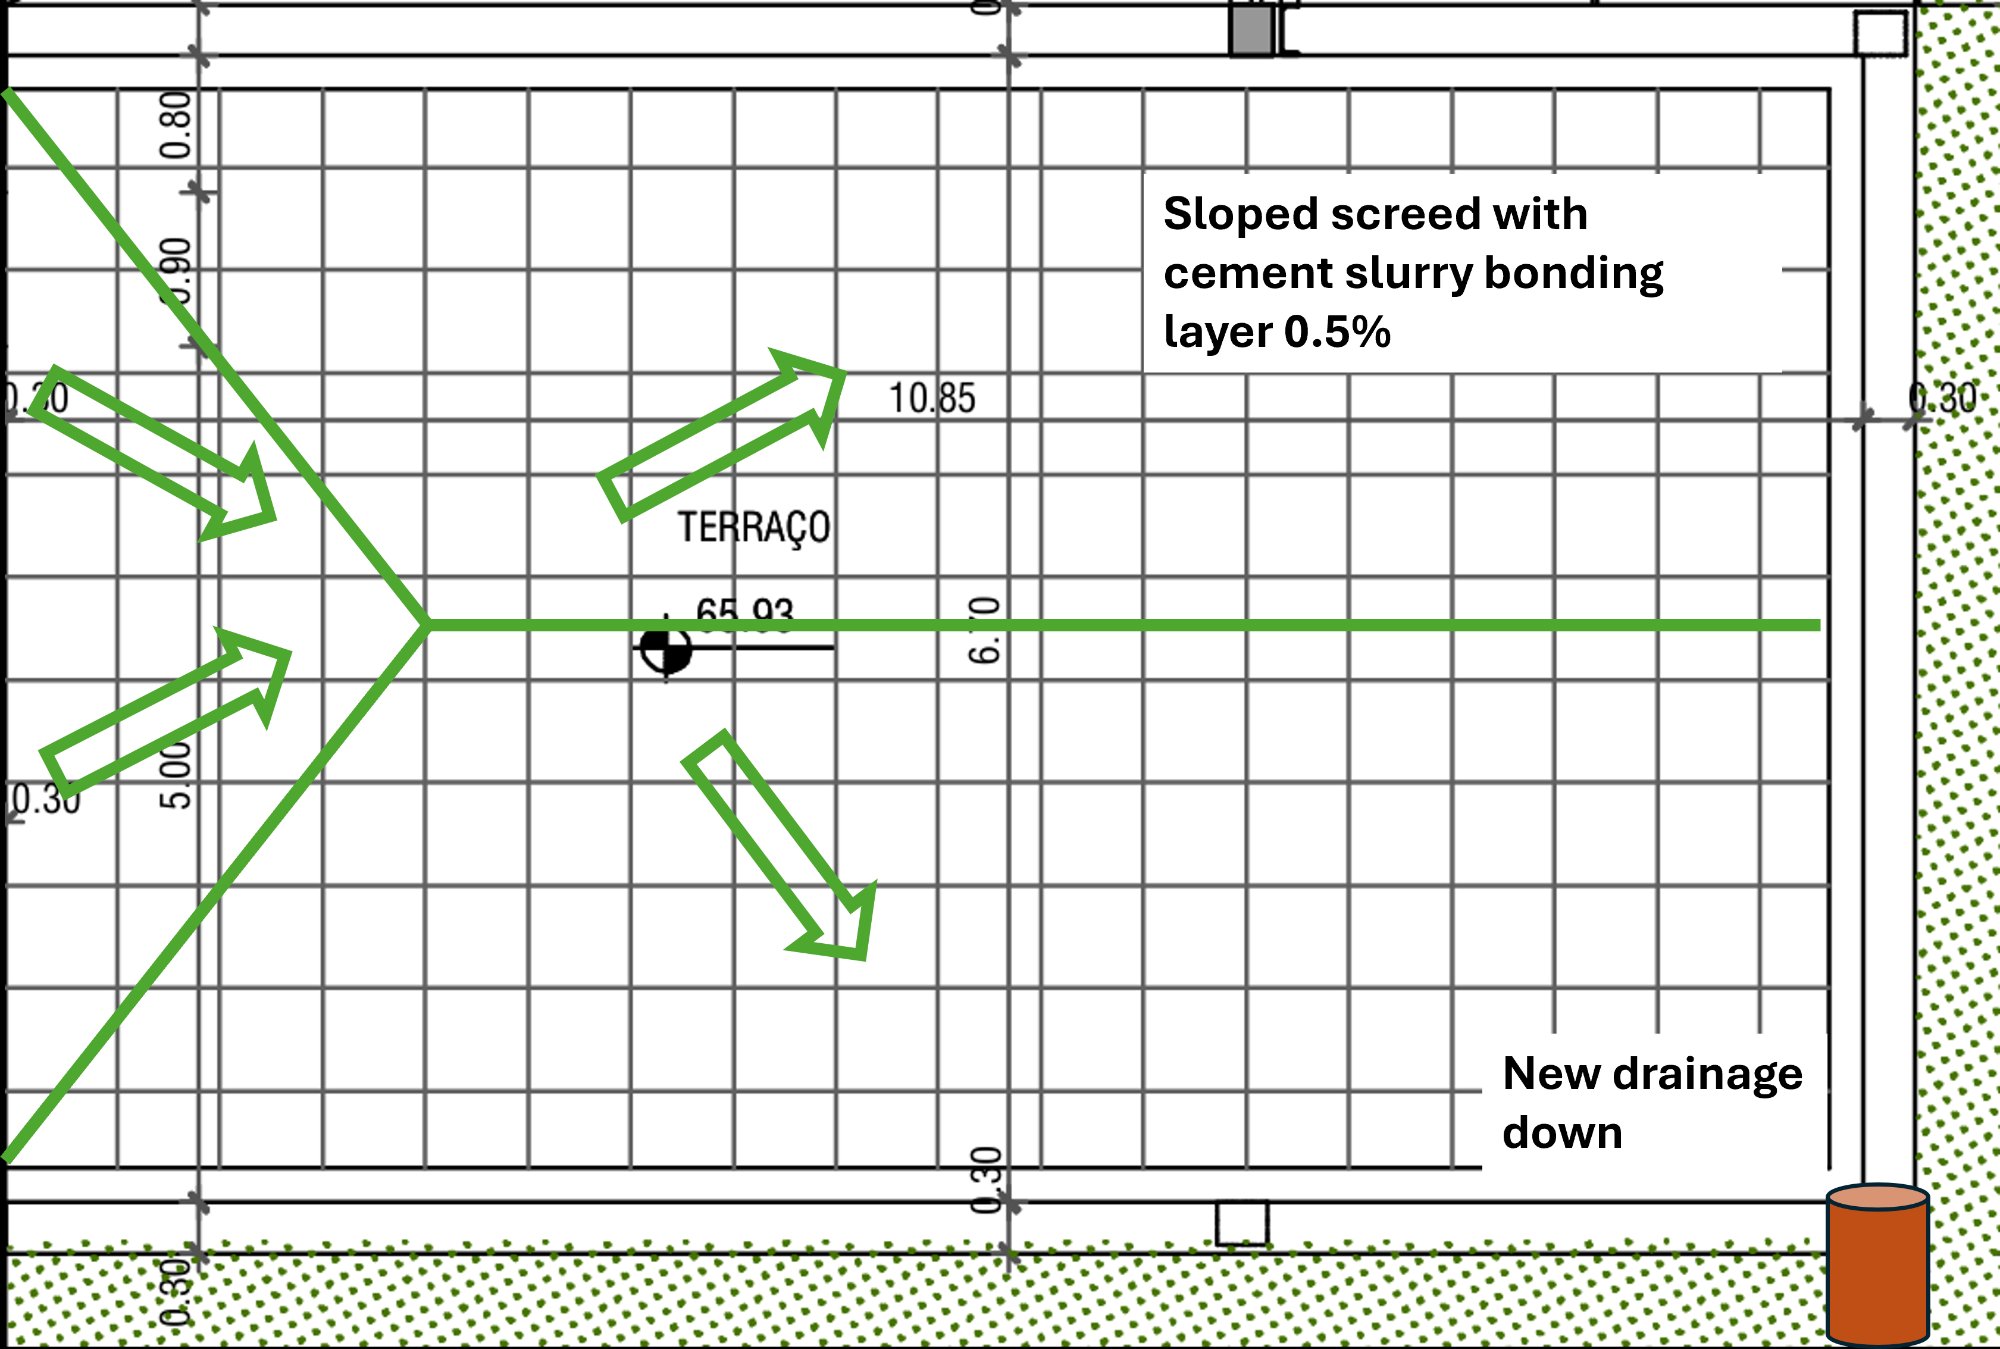
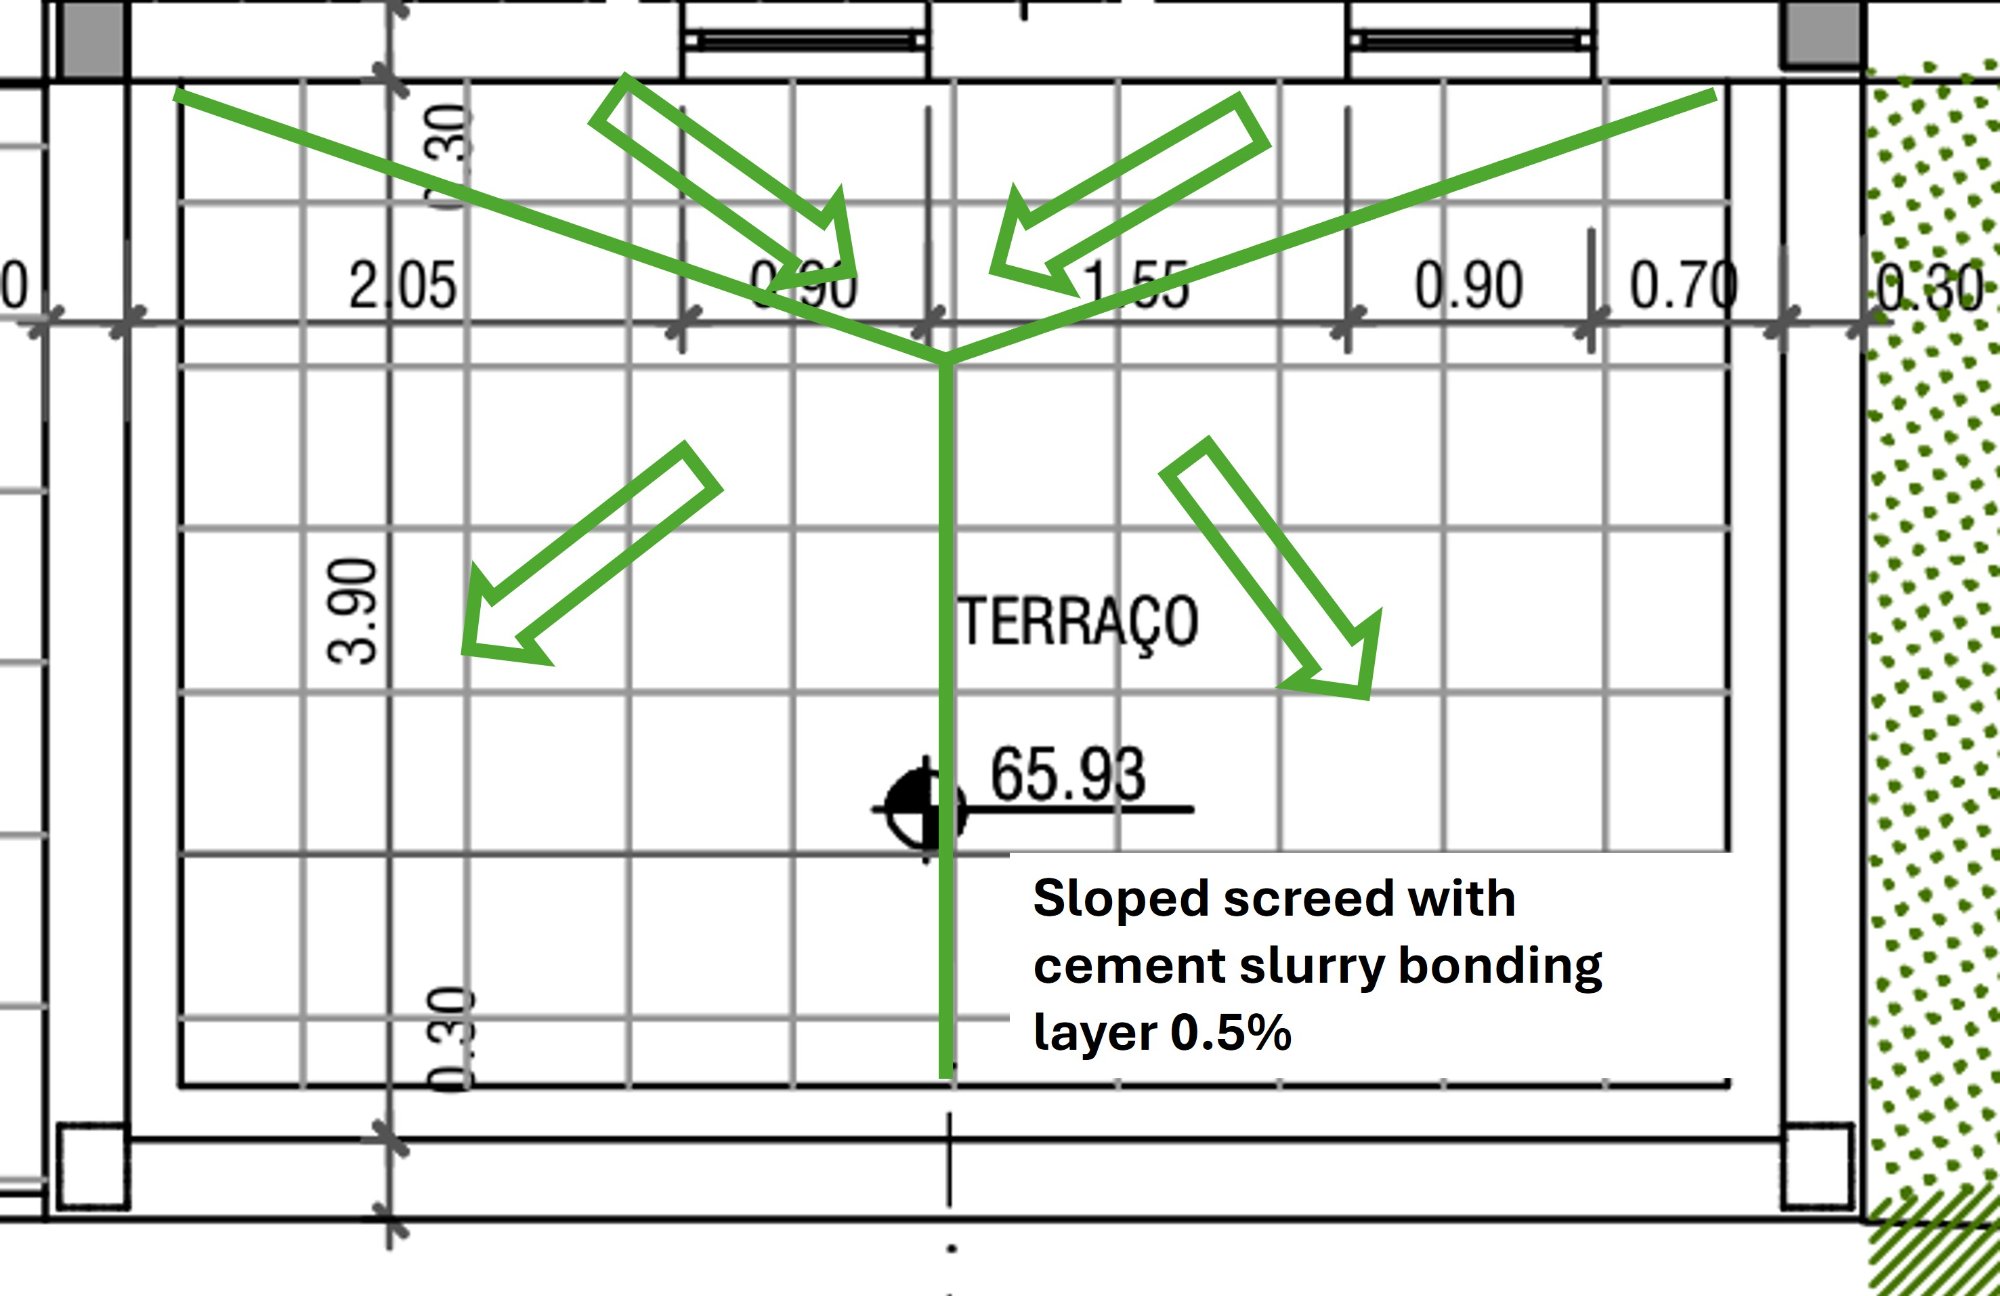
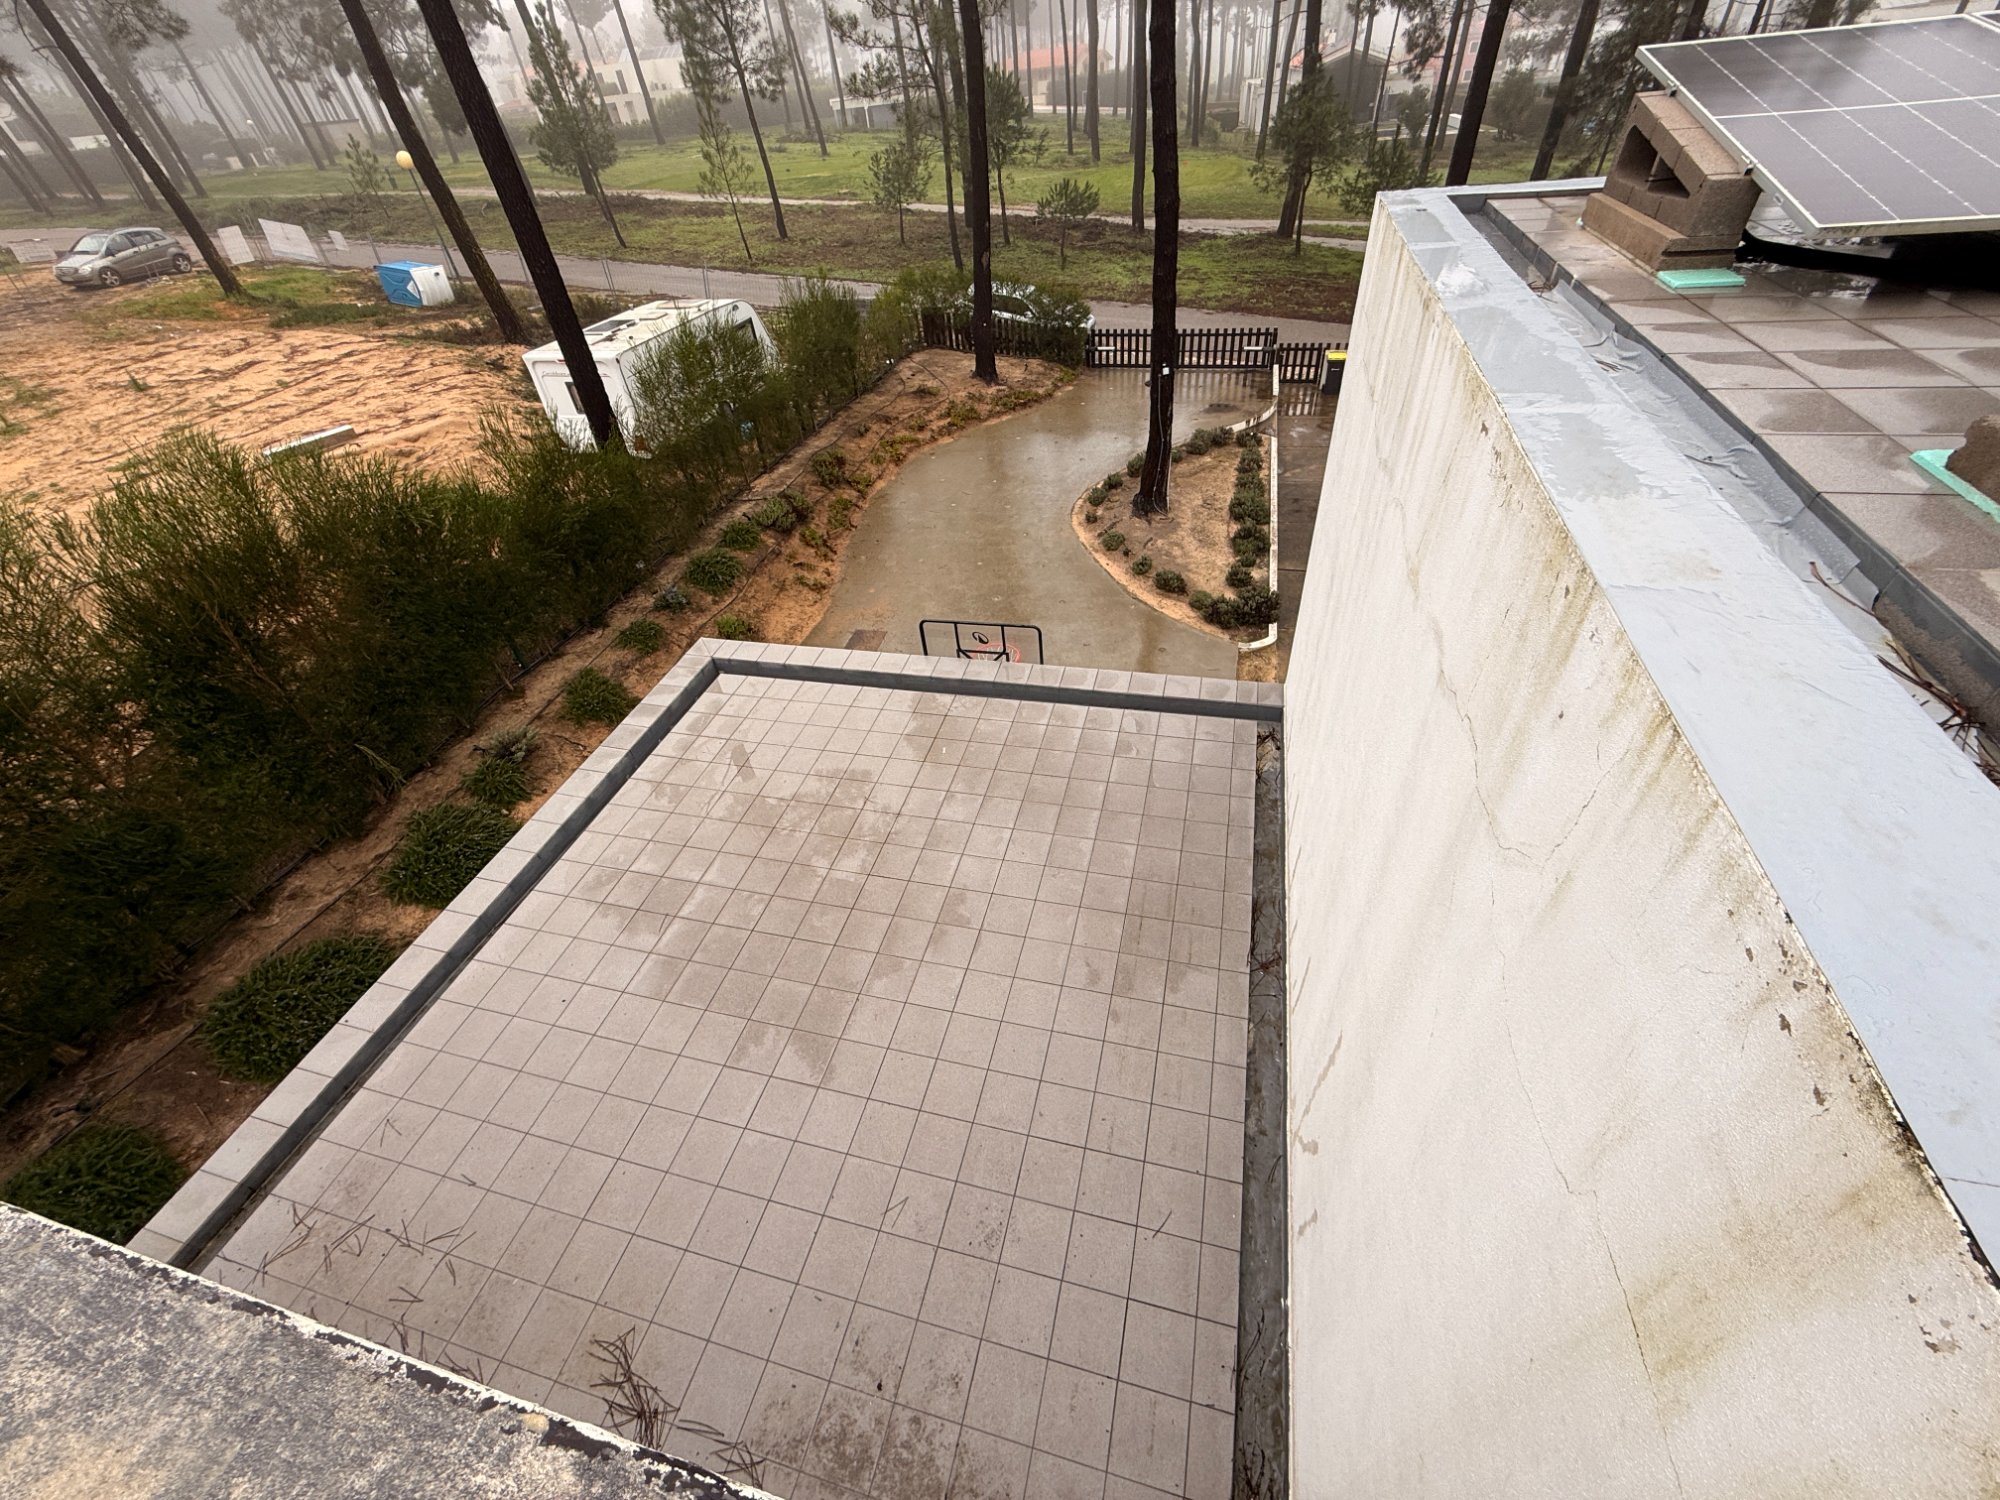
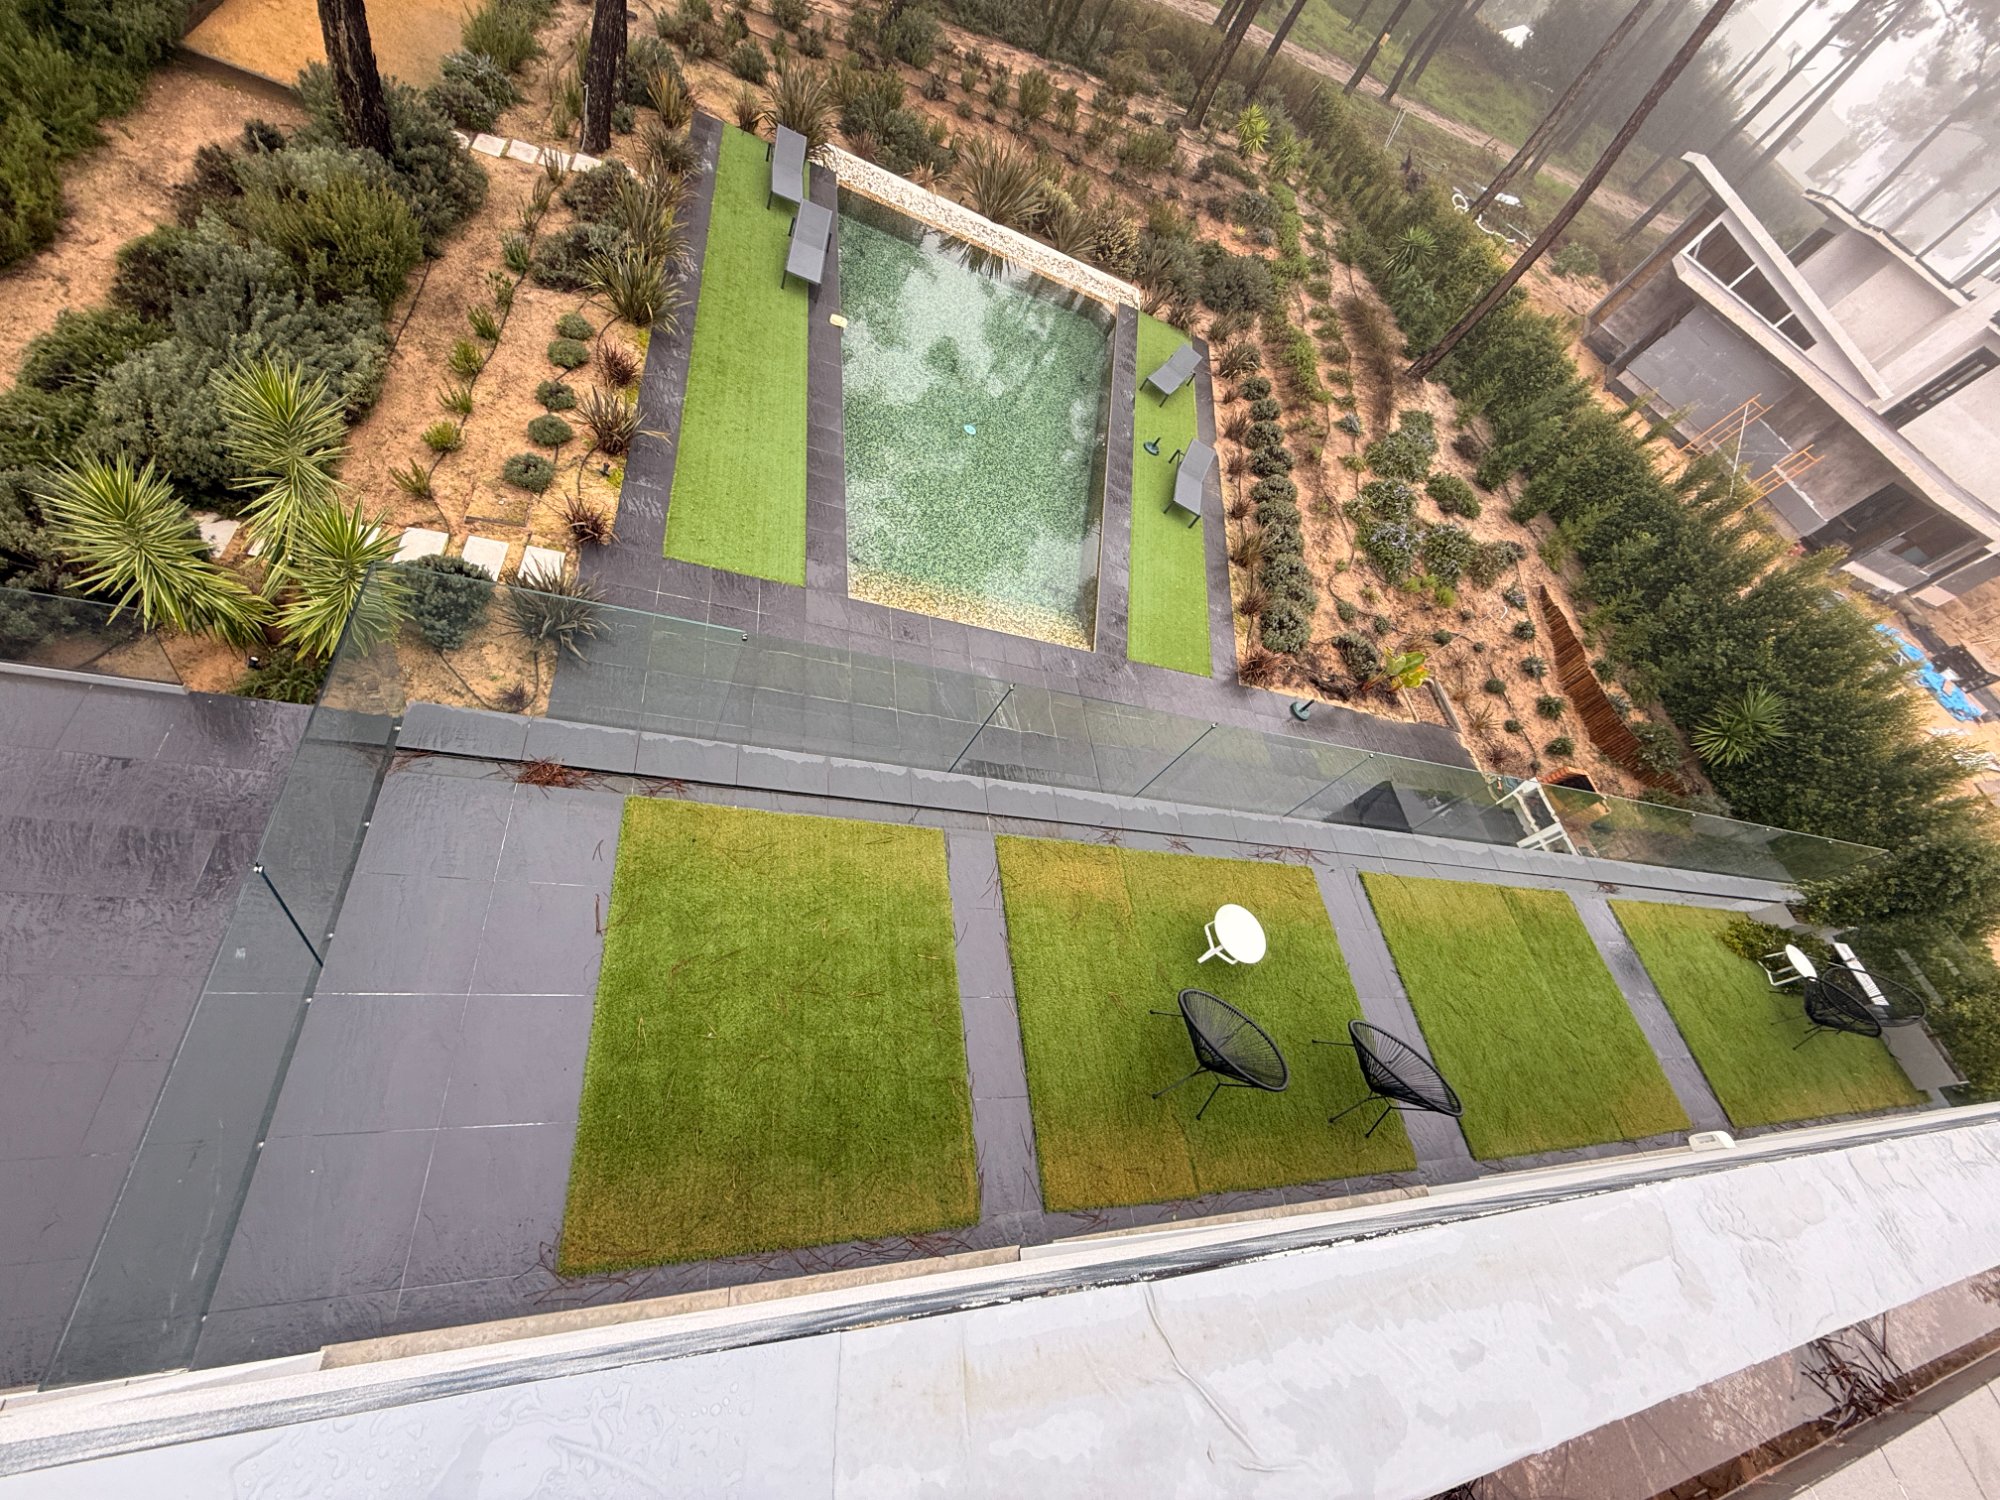
4. Rear terrace, ground floor
New paving of rear terrace on ground floor
5. Interior work
Painting, mould removal inside, replacement of all suspended ceilings on all ground floor terraces (3)
6. Windows
Replacement of windows in the living and dining areas and raising them to ceiling height
Area overview
| # | Area | Dimensions | Area |
|---|---|---|---|
| 1 | Flat roof T-shape | 14.25×9.20 + 6.70×7.30 | 180.0 m |
| ↳ Northern section | 14.25 × 9.20 | 131.1 m | |
| ↳ South section | 6.70 × 7.30 | 48.9 m | |
| 2 | Garage roof | 5.90 × 5.70 | 33.6 m |
| 3 | Front lawn terrace | 11.80 × 7.30 | 86.1 m |
| 4 | Terrace east side | 6.70 × 4.50 | 30.2 m |
| 5 | Rear balcony | 3.00 × 16.50 | 49.5 m |
| 6 | Pool terrace (ground floor) | 5 × 21 + 3 × 11.5 − 4.8 × 3.5 | 122.7 m |
| ↳ Main pool area | 5.00 × 21.00 | 105.0 m | |
| ↳ Additional living room & media area | 3.00 × 11.50 | 34.5 | |
| ↳ Deduction for south garden | 4.80 × 3.50 | −16.8 m | |
| TOTAL | 502.1 | ||
| Of which with roof insulation | 379.4 m | ||
| Of which with tiles | 322.1 m |
📷 Photo glossary
Flat roof
180.0 m²
Balcony Garage
33.6 m
Balcony Lawn
86.1 m
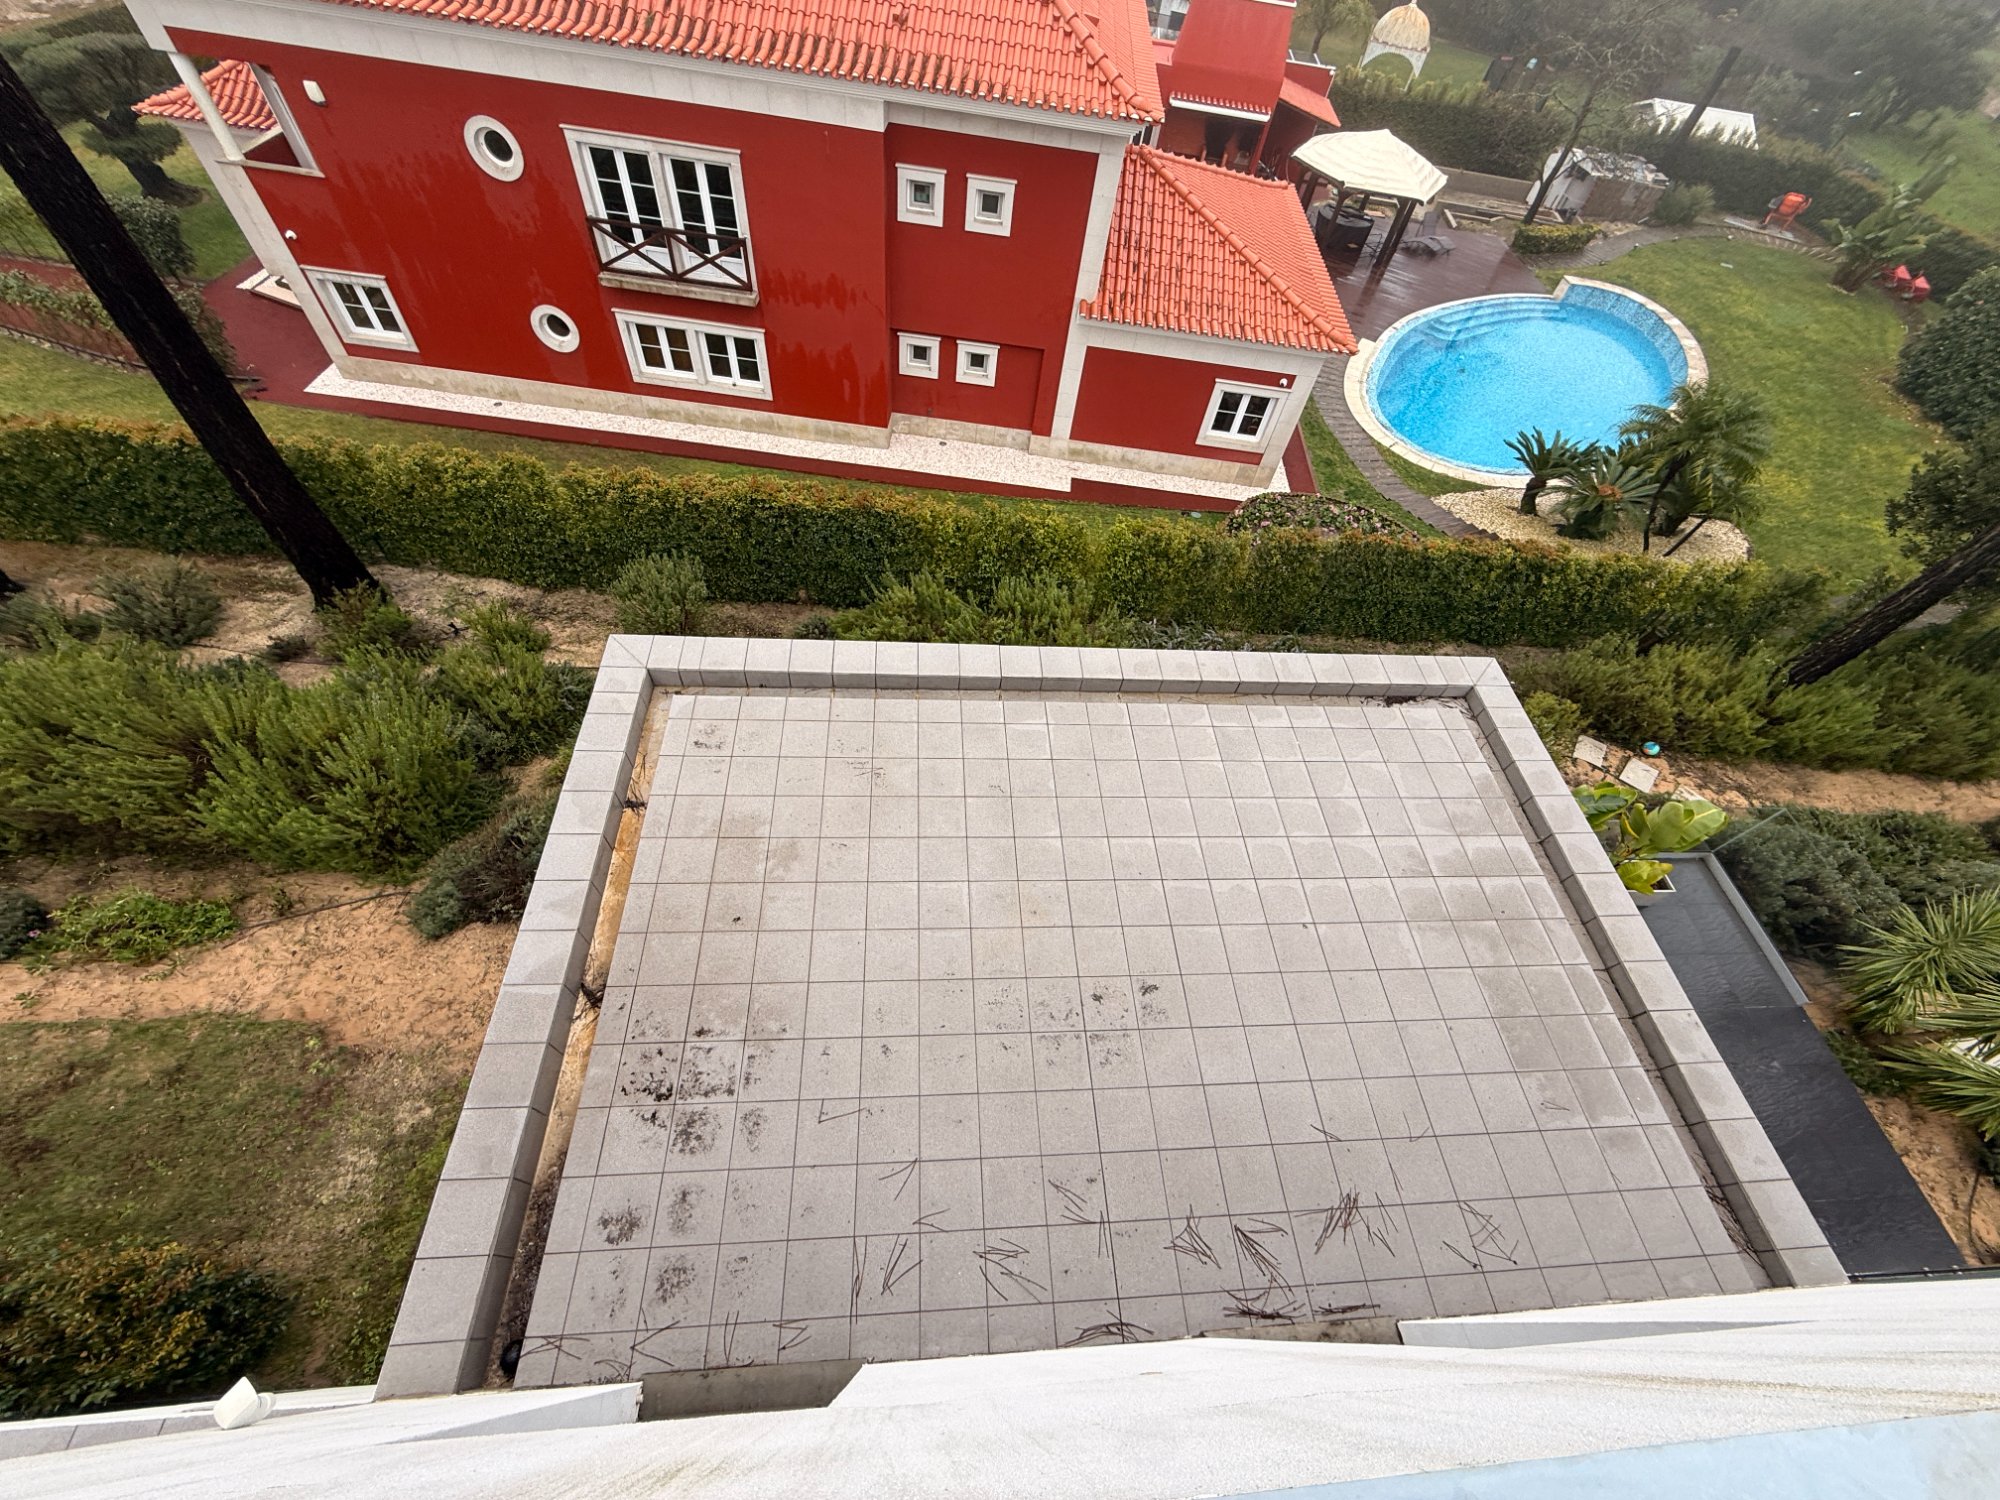
East-facing balcony
30.2 m
Rear balcony
49.5 m

Pool terrace
122.7 m
📄 Plans
PDF
Property data
Property identification
| Land area | 2,017 m |
| Built-up area | 307.61 m |
| Gross area | 432.90 m² |
| Building height | 6.36 m |
| Building permit | Alvará 3916/18 (17 July 2018) |
| Construction process no. | 48/17 (C.M. Almada) |
| Statics & supporting structure | |
| Concrete | C30/37 |
| Reinforcing steel | A500NR, 500 MPa |
| Foundations | Individual foundations (footings) |
| Soil bearing capacity | 0.20 MPa |
| Earthquake zone | Zone A, soil class II |
| Wind pressure | 0.70 kN/m² |
| Solar | |
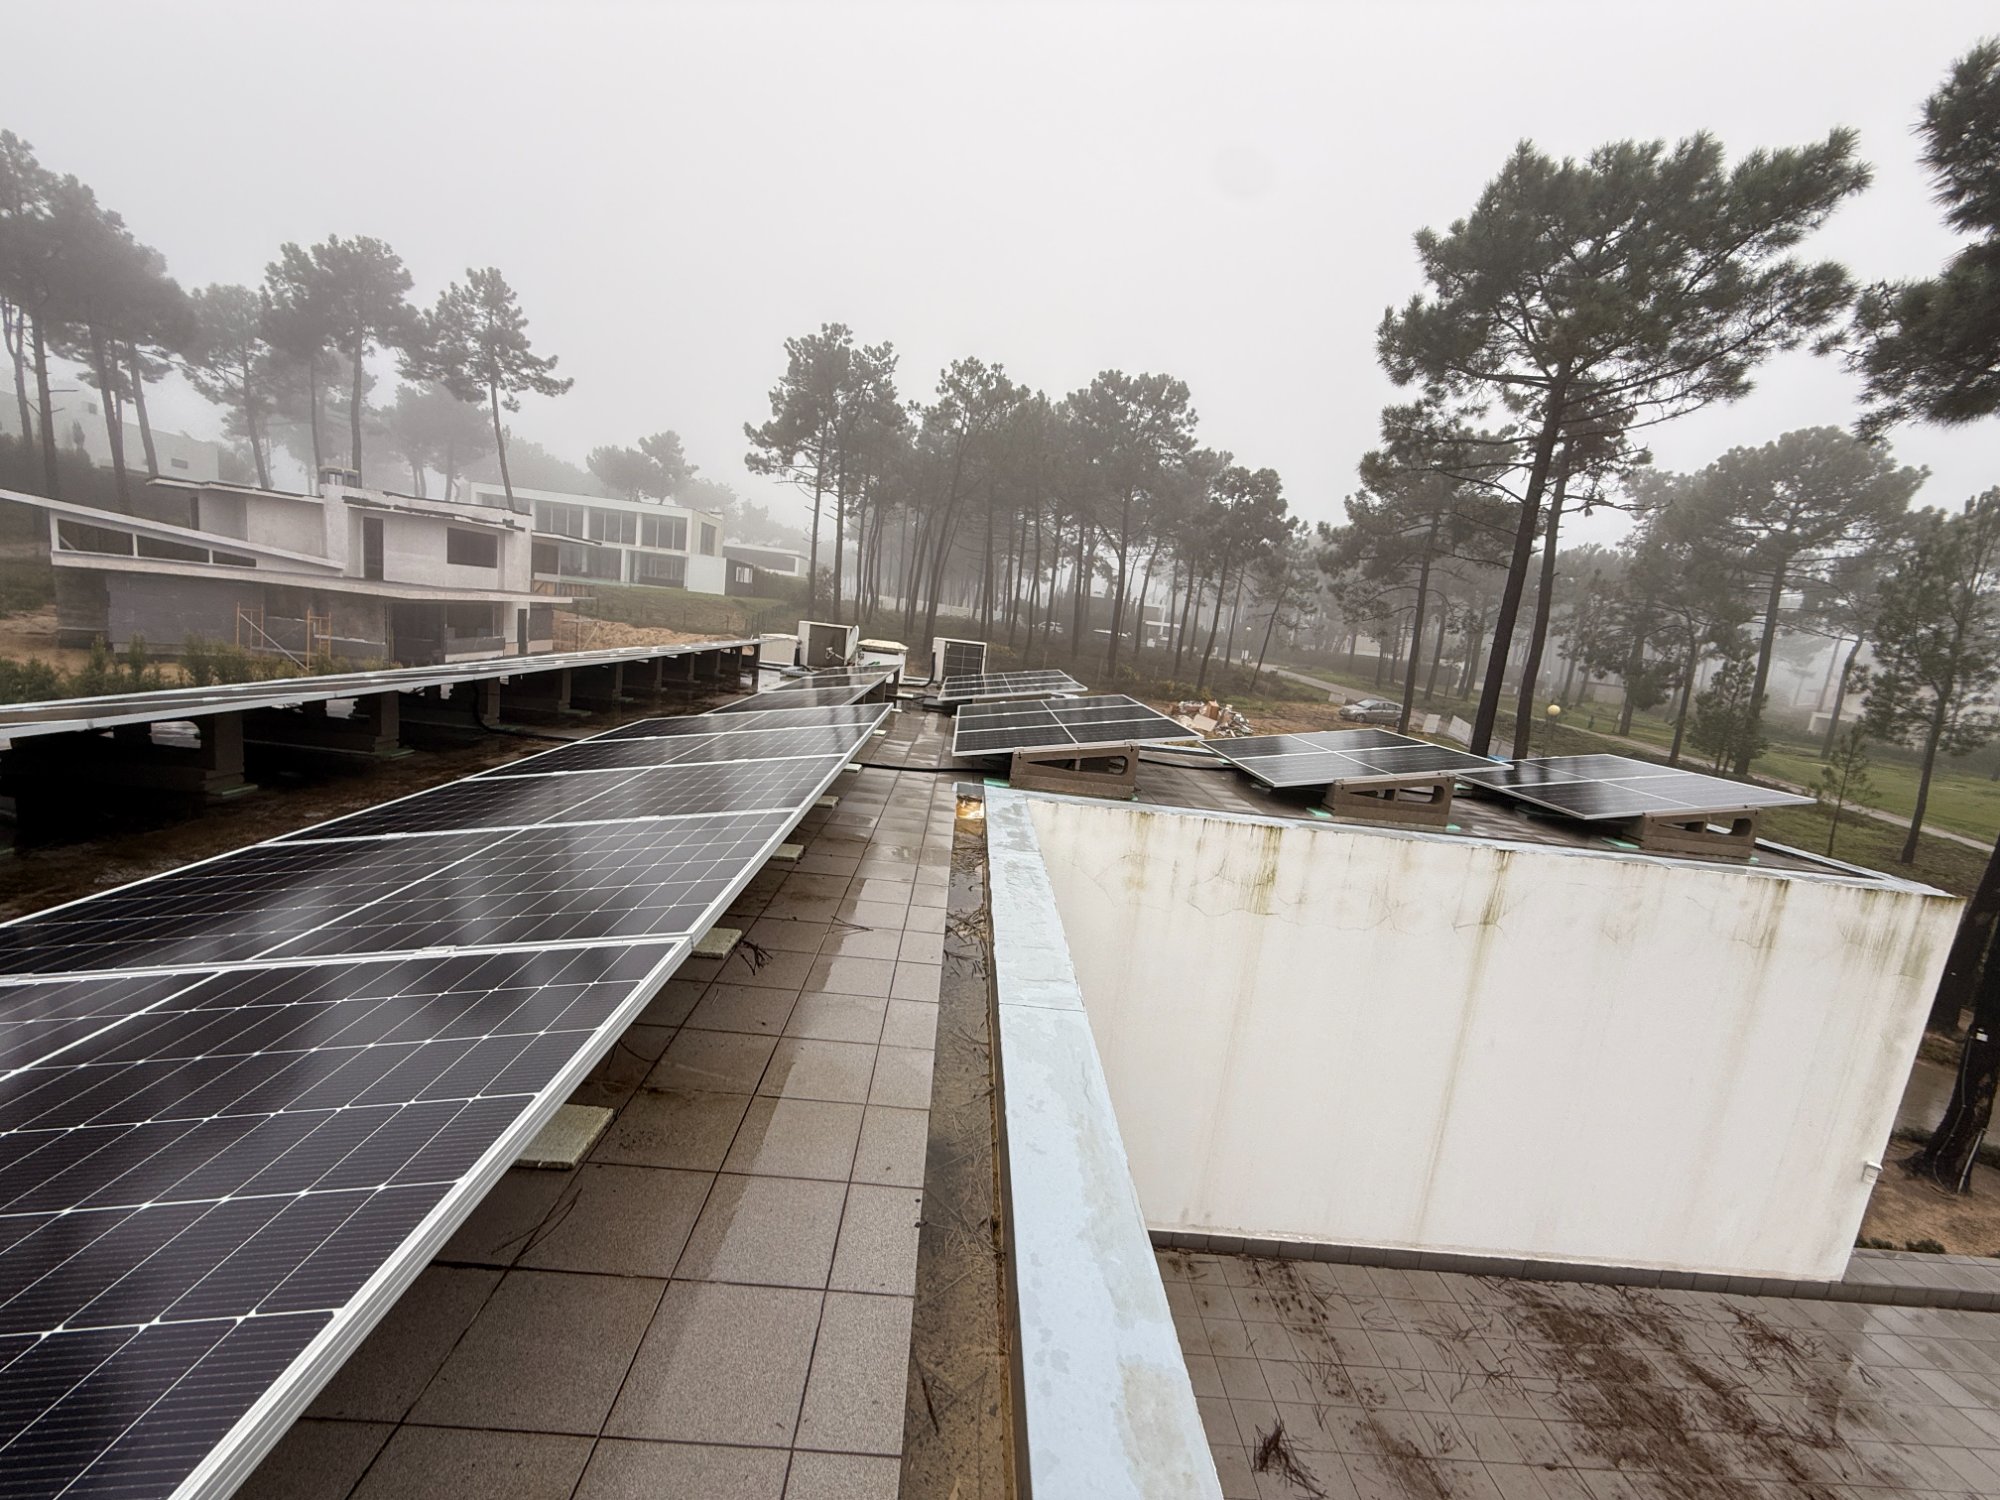
| Number of panels | 31 |
| Mounting system | SOLARBLOC® V815 (10°) |
| Number of SOLARBLOC® units | approx. 58 |
| SOLARBLOC® Floor space | 100 × 21 cm |
| Total ballast | ~3,100 kg |
Existing data (from original construction plans)
Load calculation for roof
Estimate based on actual ceiling thickness
| Load capacity (estimated, 17 cm solid ceiling C30/37) | |
| With 3 m span | ~10-12 kN/m² |
| With a span of 4 m | ~7-9 kN/m² |
| Conservative estimate | ~7 kN/m² |
| Planned roof structure | |
| XPS insulation 80 mm | ~0.03 kN/m² |
| Bitumen waterproofing (2 layers) | ~0.15 kN/m² |
| Payload (access, wind) | ~1.00 kN/m² |
| Total roof structure | ~1.2 kN/m² |
| SOLARBLOC® | |
| SOLARBLOC® V815 + module | ~0.50 kN/m² |
| Total SOLARBLOC® | ~1 kN/m² |
| Total load | ~2.2 kN/m² |
| Reserve | ~4.8 kN/m² (>60%) |
Actual roof structure (measured in bedroom)
Insulation & slope missing!
| # | Layer | Thickness |
|---|---|---|
| 2 | Tiles | ~1 cm |
| 1 | Bitumen LBM(SBS)-40-FP + adhesive | ~0.5 cm |
| 0 | Reinforced concrete solid ceiling | ~16 cm |
| (rod camera confirmed: no hollow bodies/ribs) | ||
| Total package (measured) | 17.35 cm |
⚠️ No slope, no insulation – plans were not implemented!
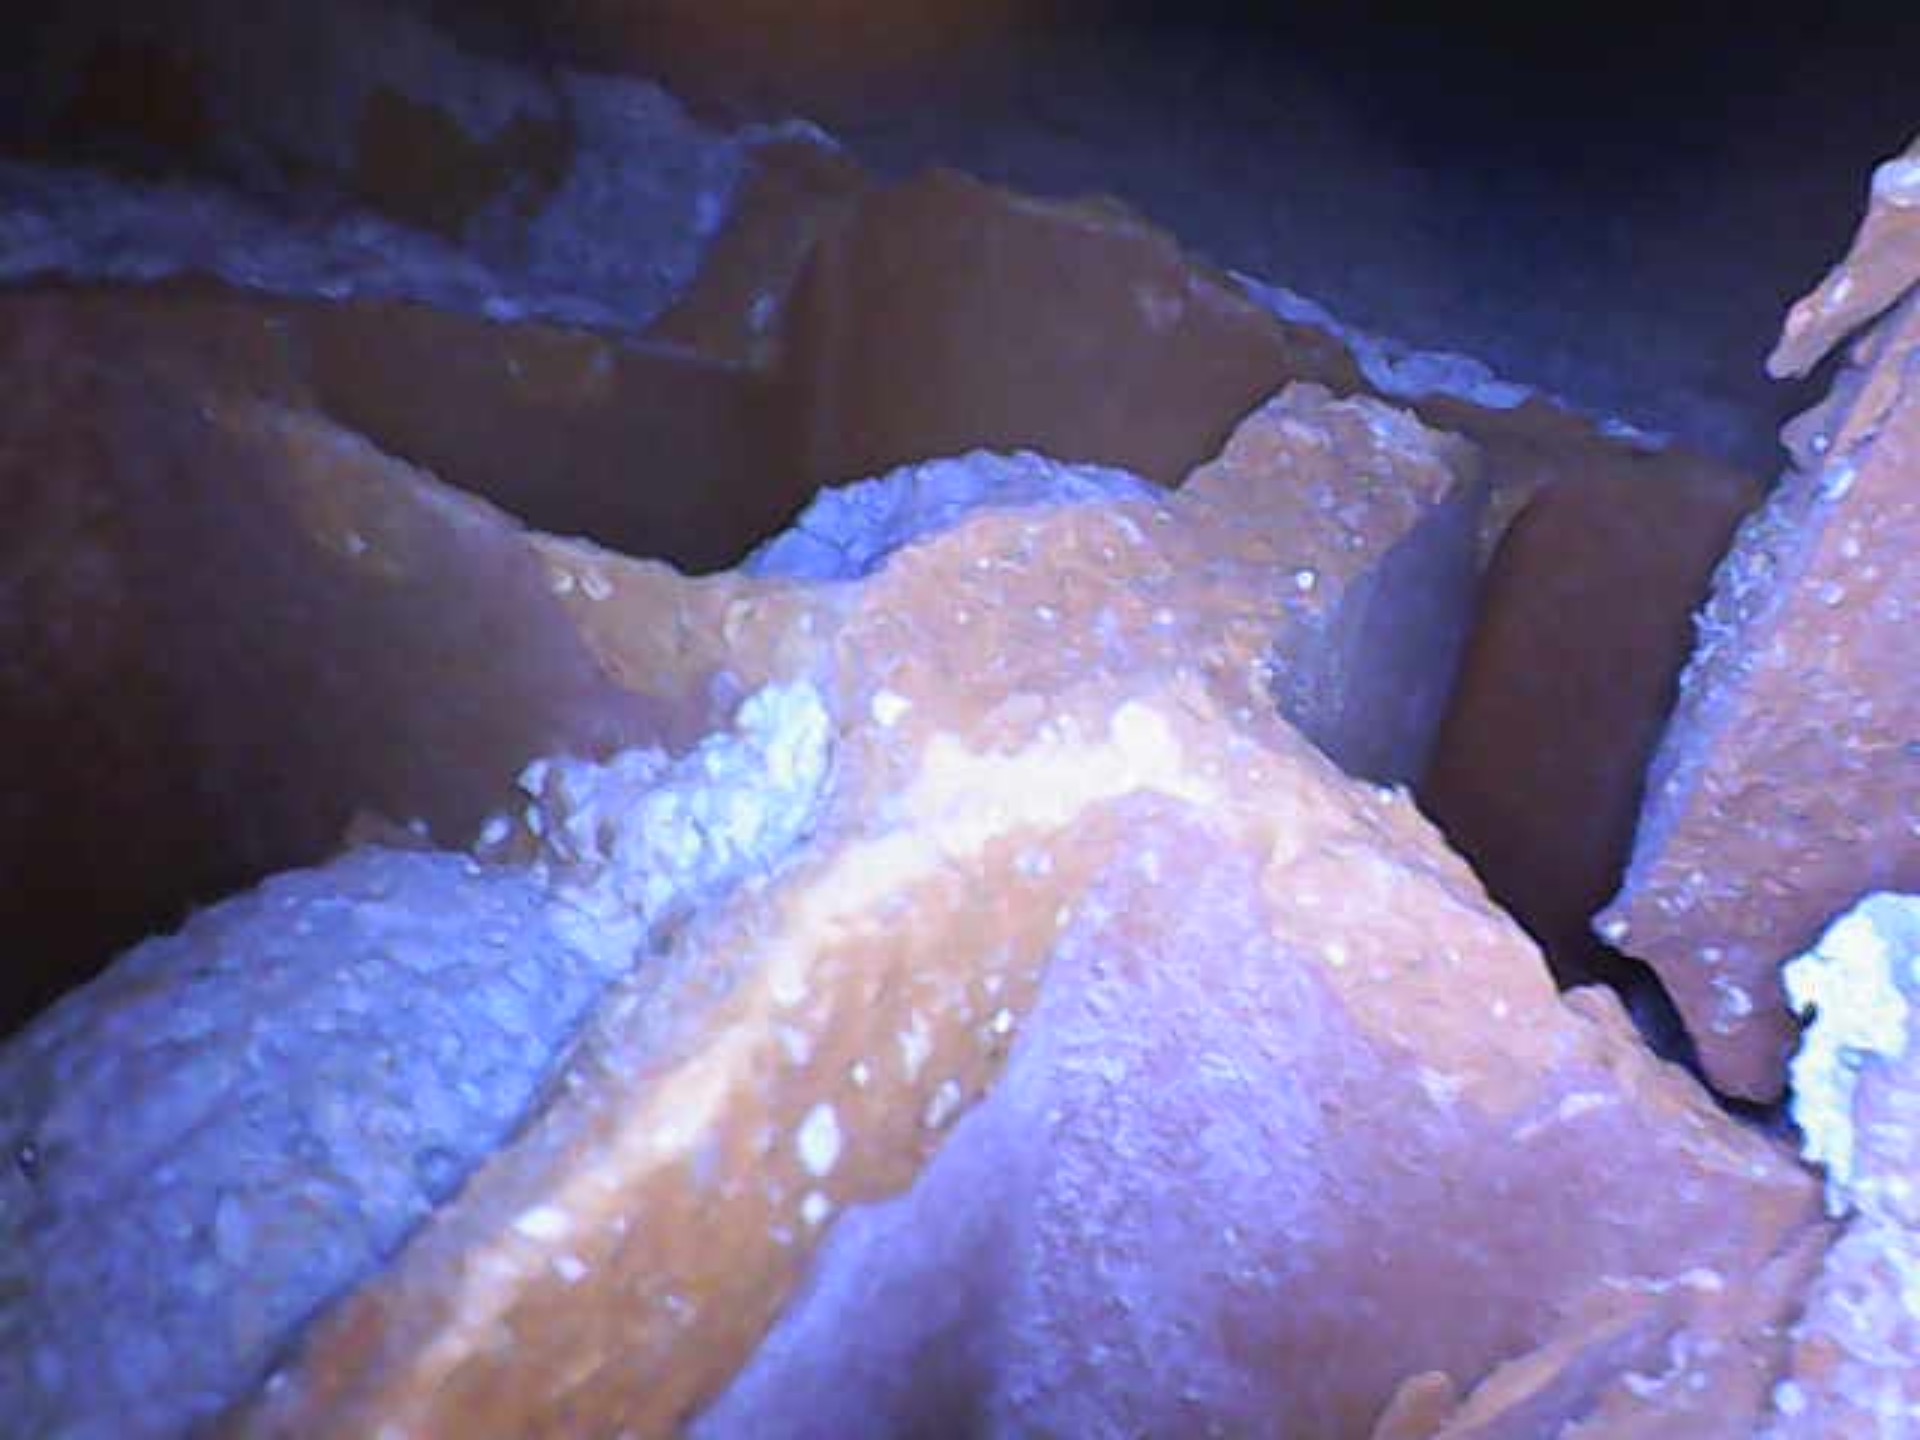
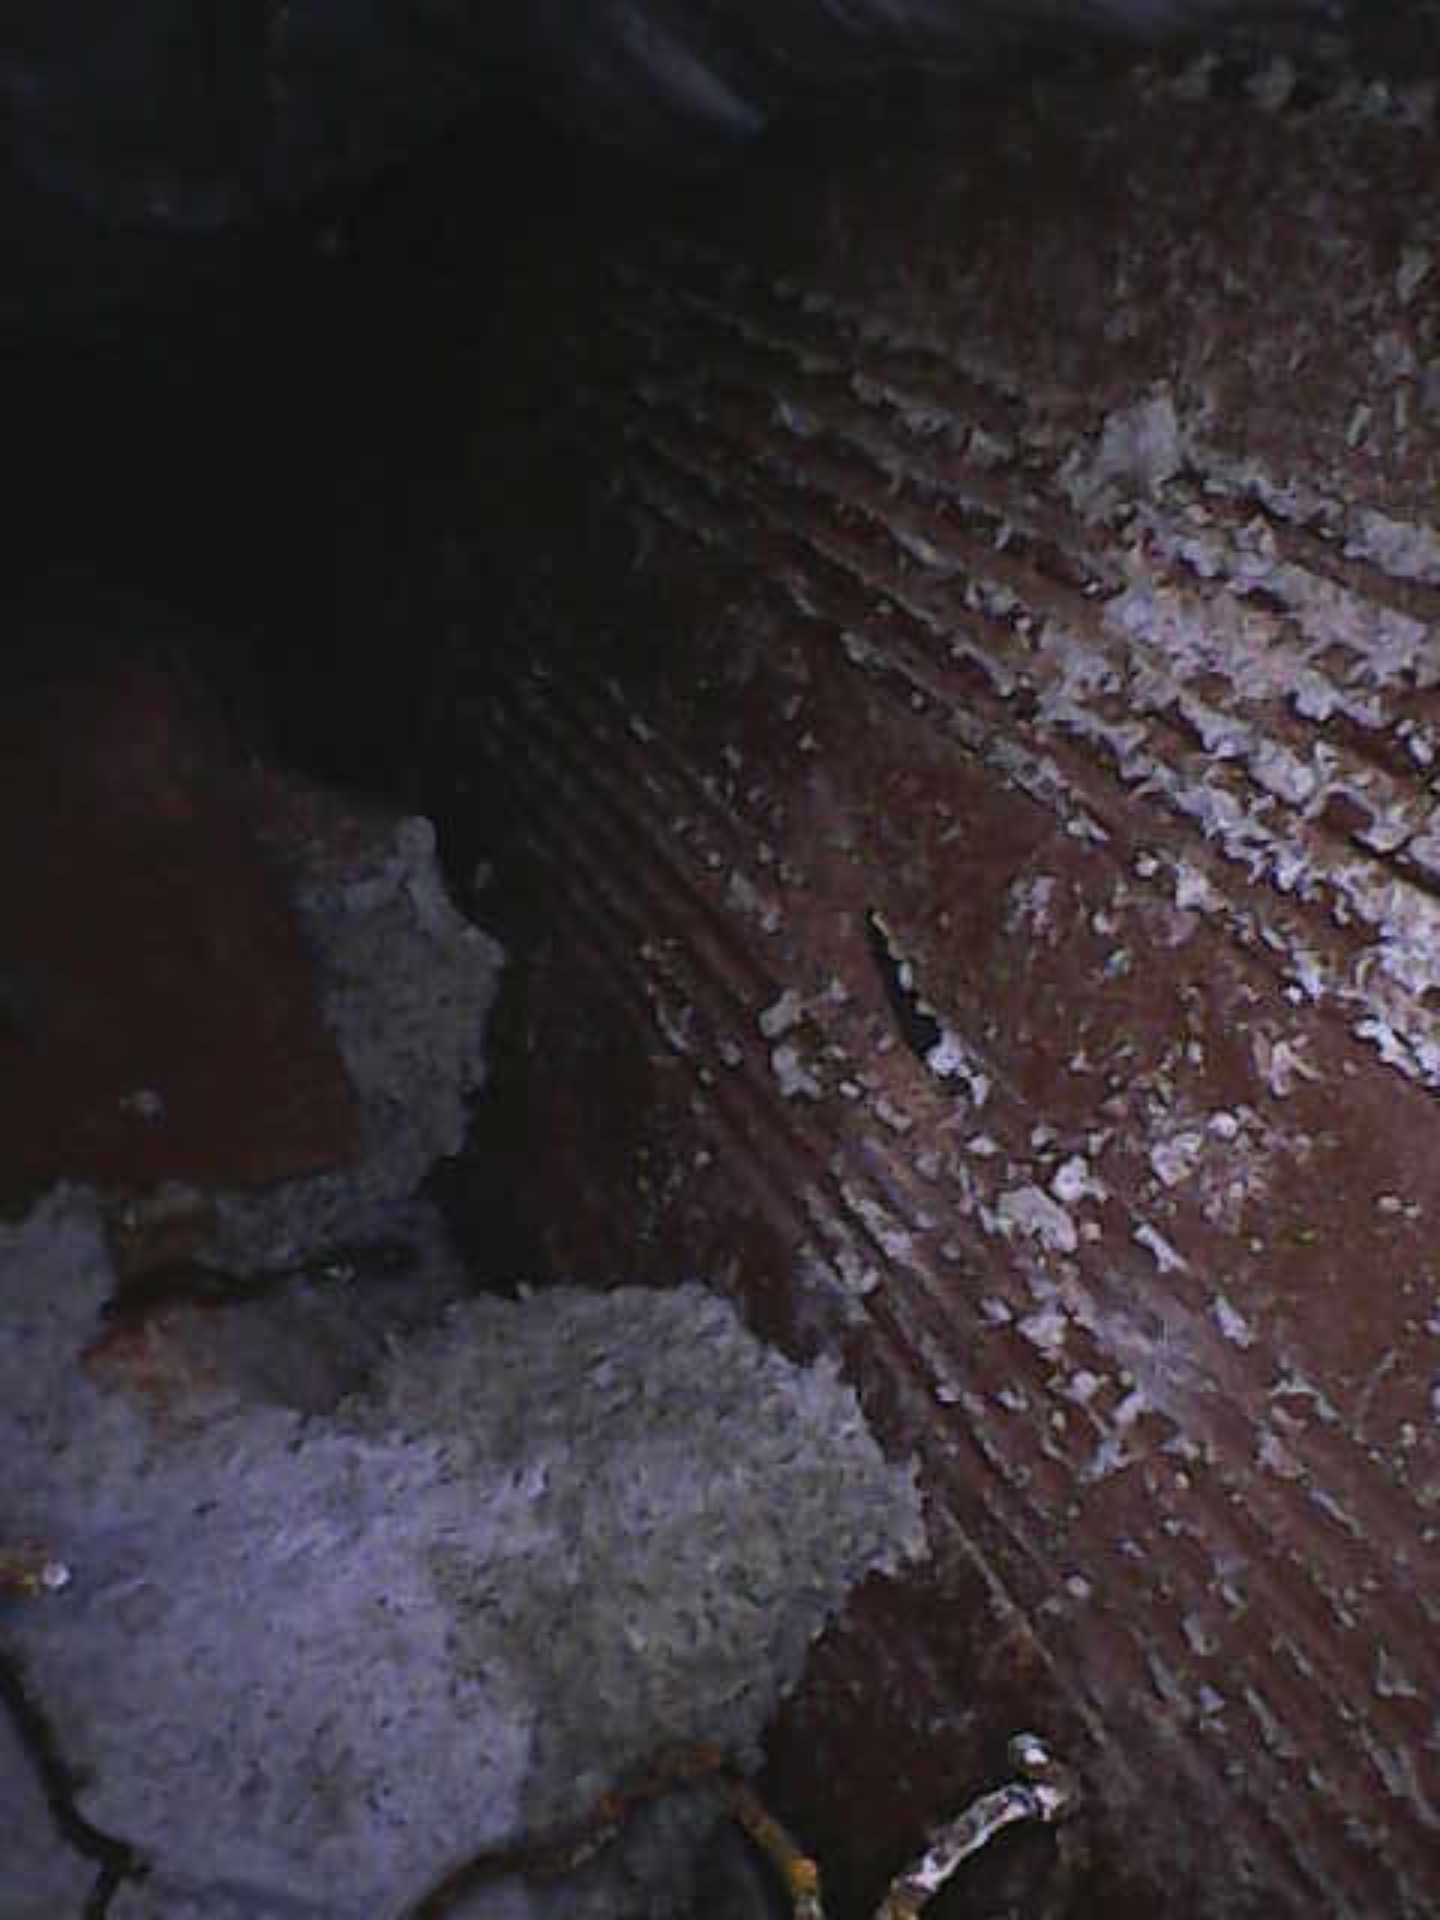
📷 Ceiling findings roof (rod camera via ventilation opening)
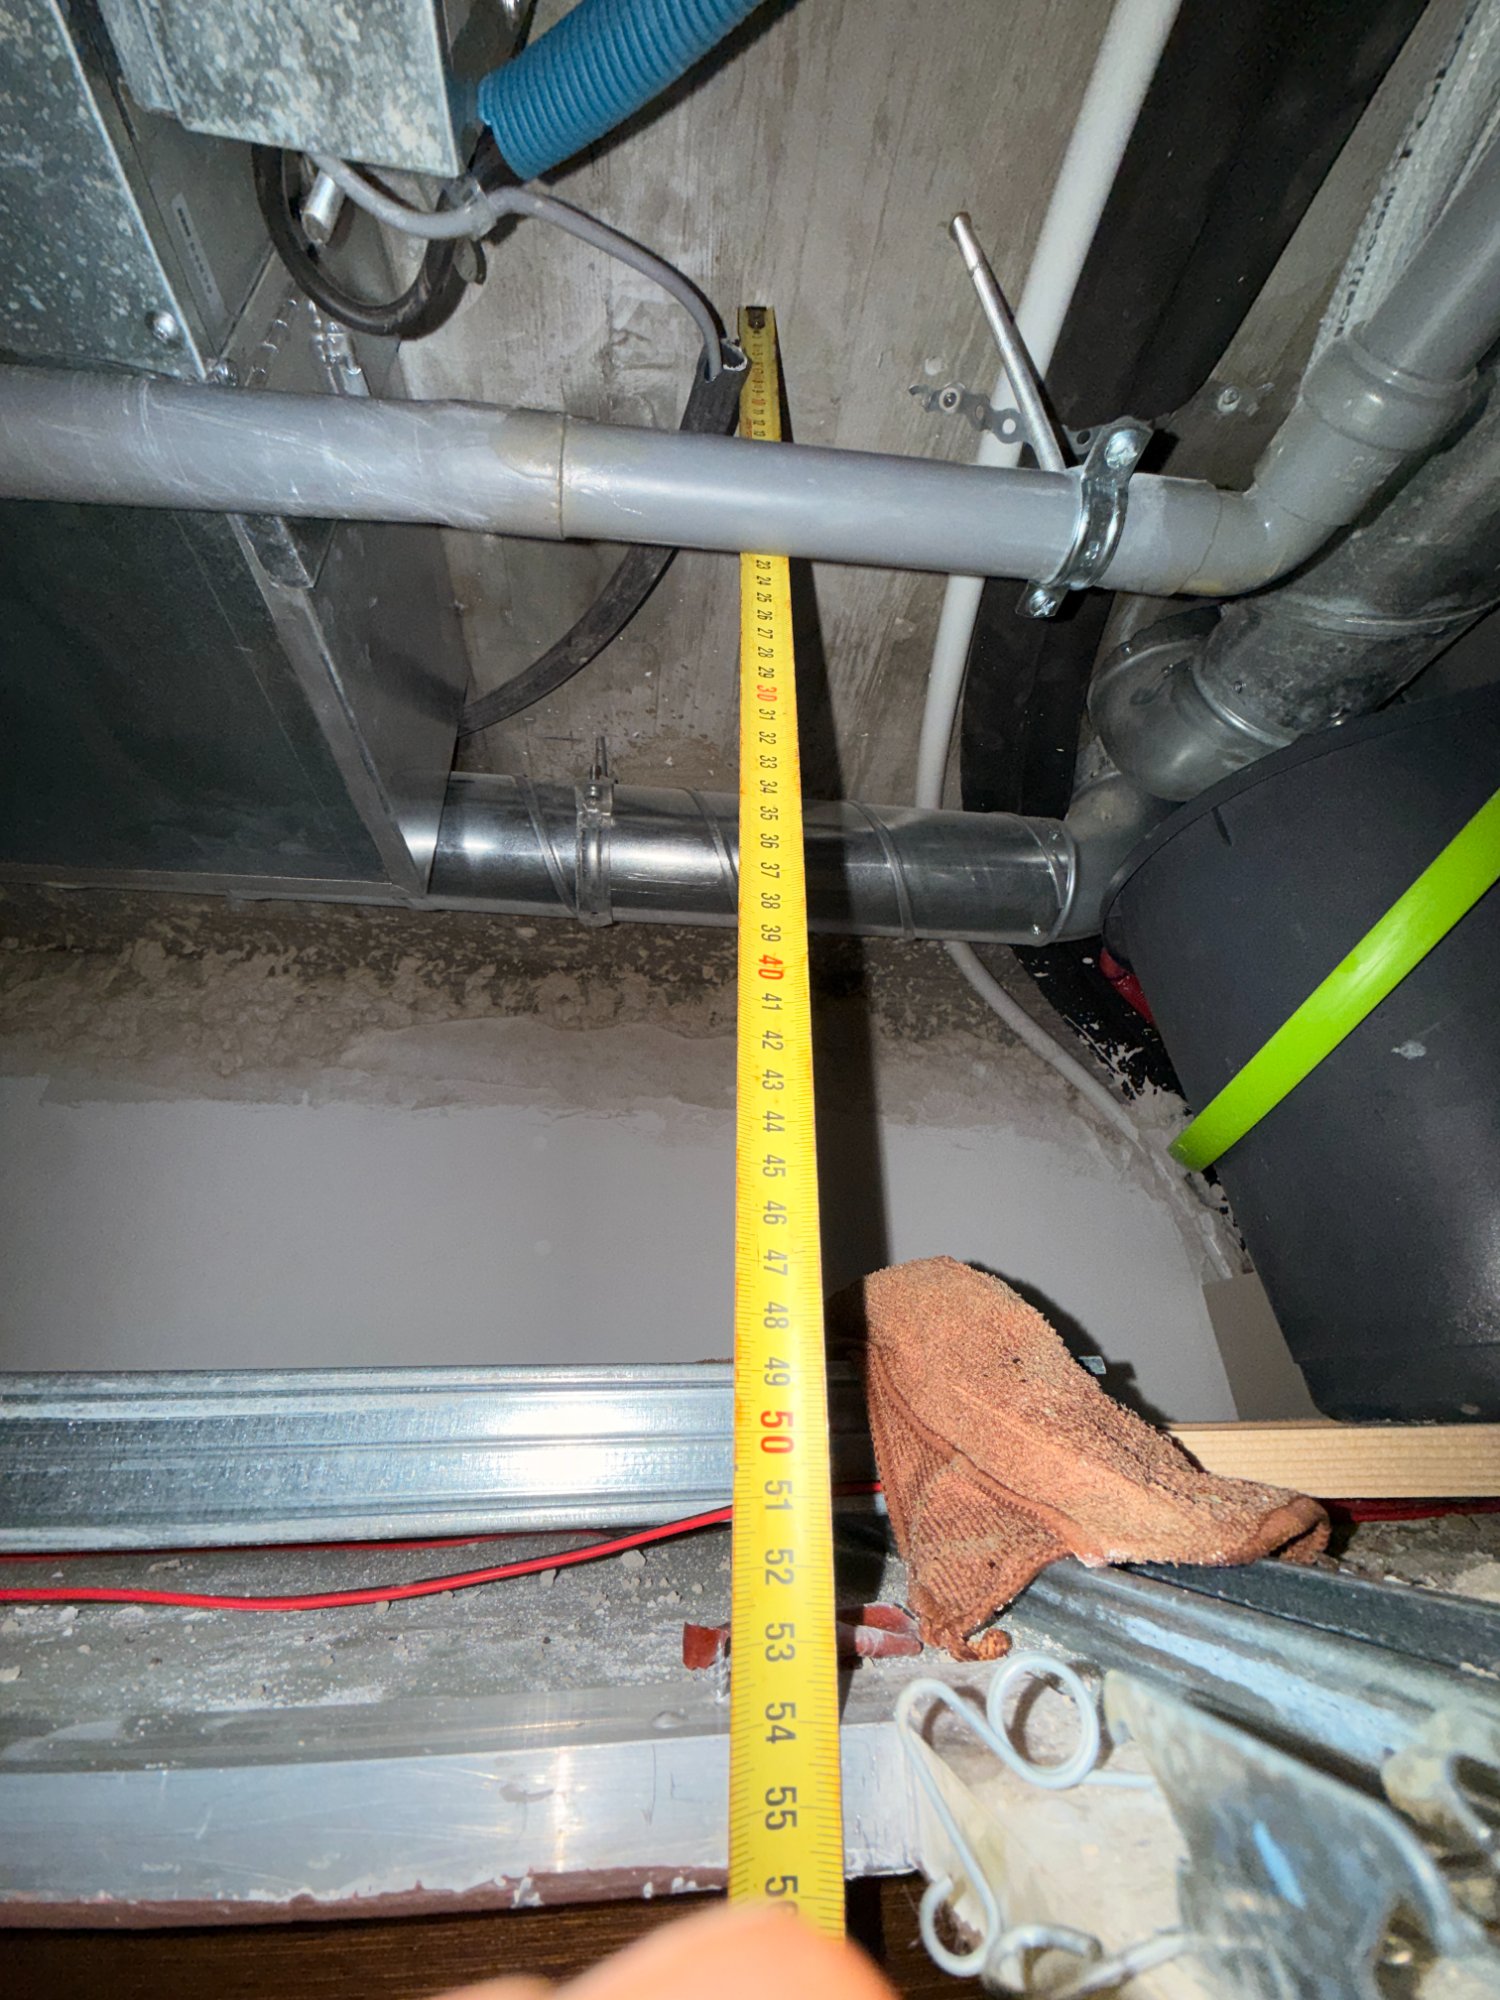
Roof ceiling from below
Solid ceiling – no ribs visible
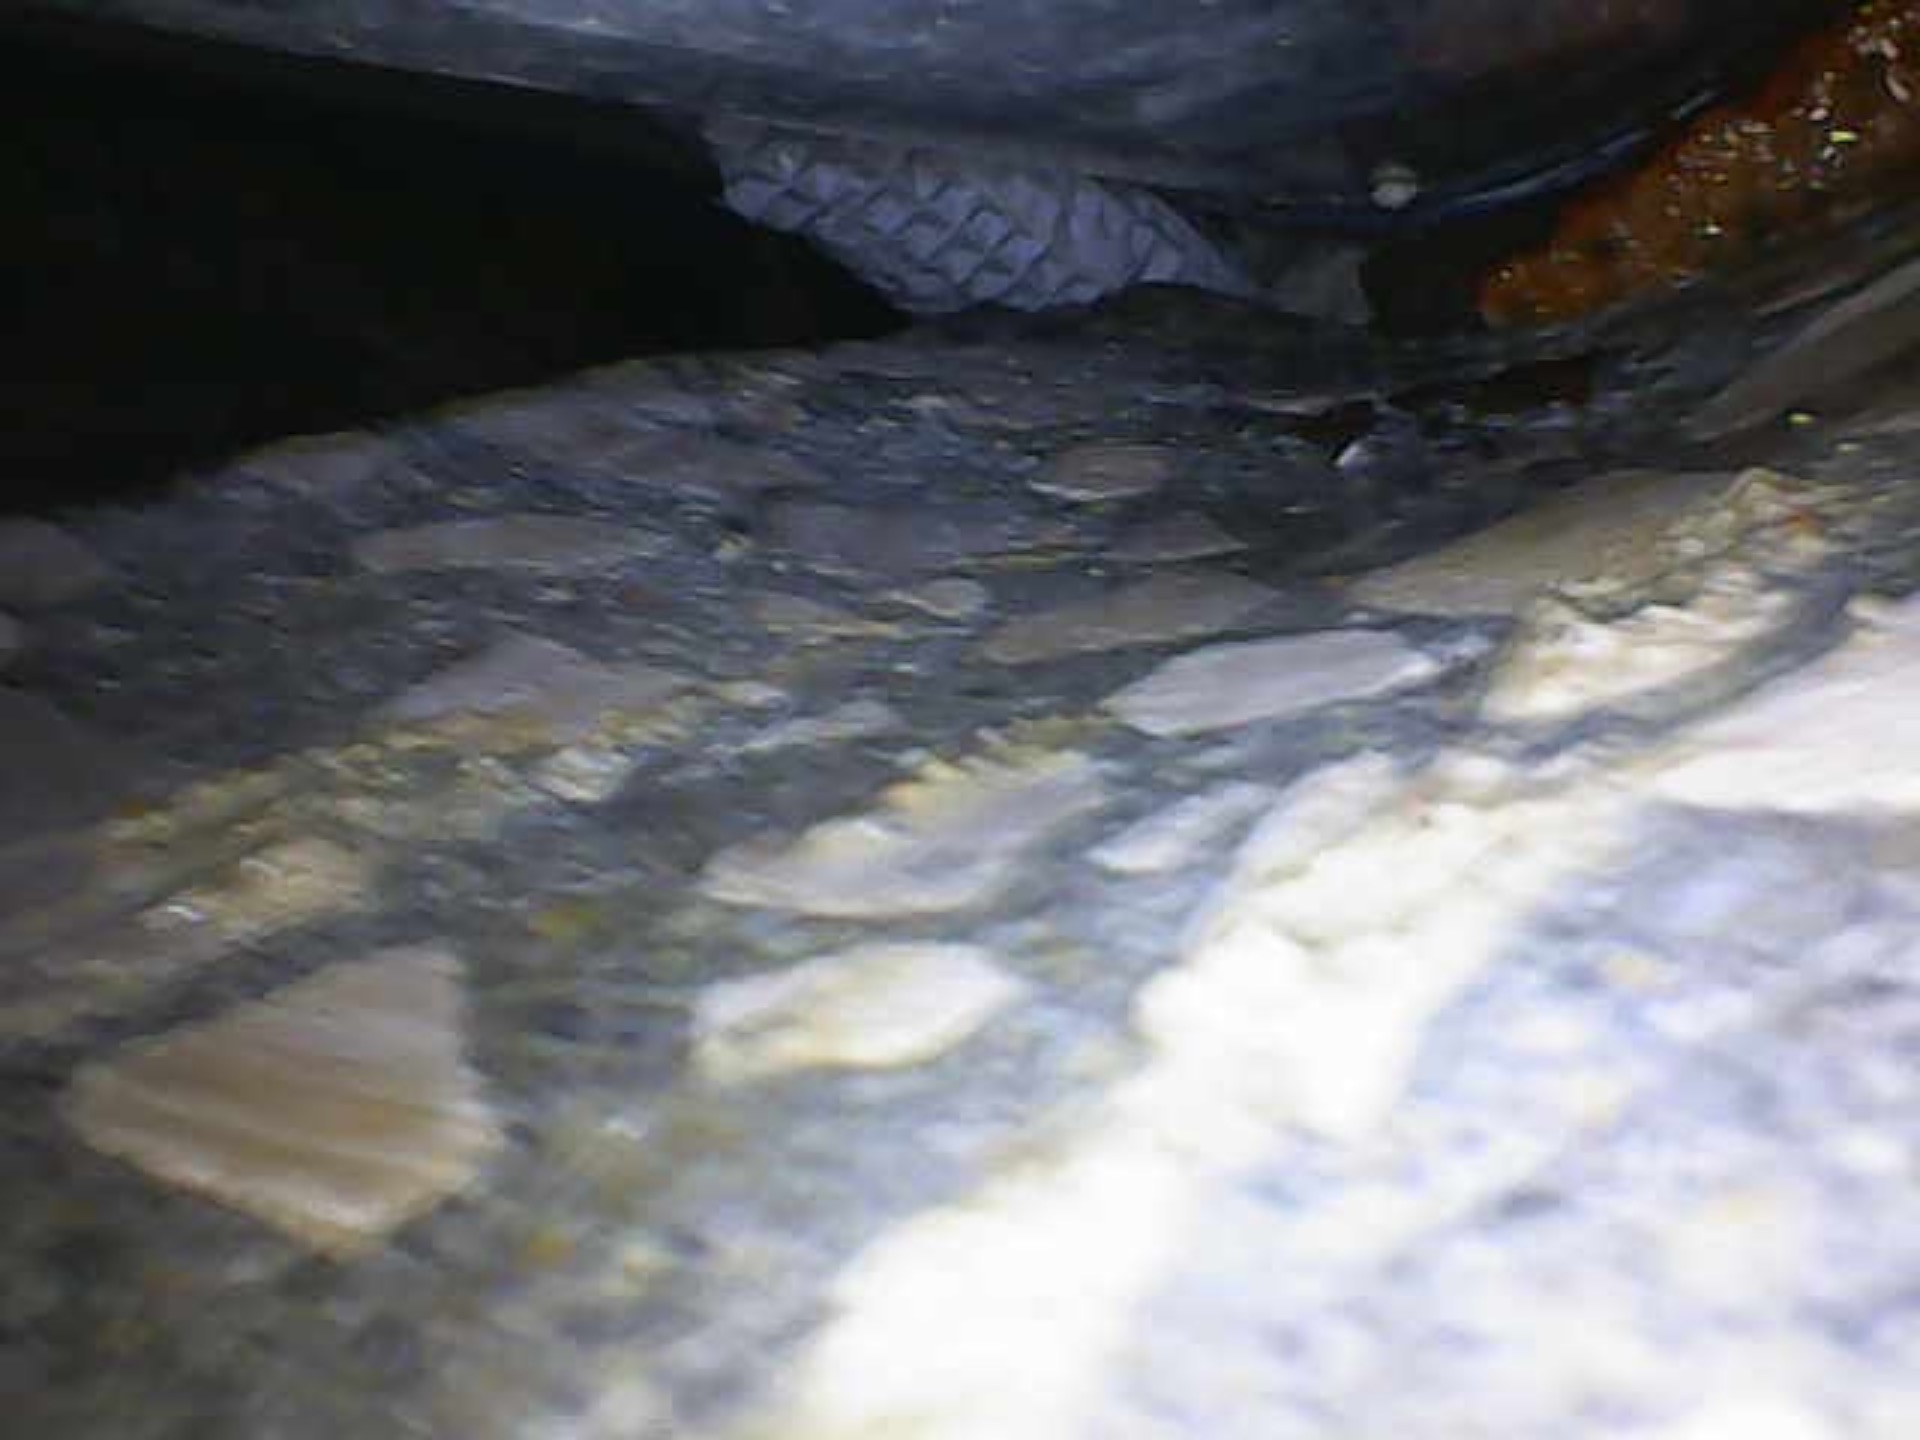
Concrete structure
Homogeneous concrete with aggregates
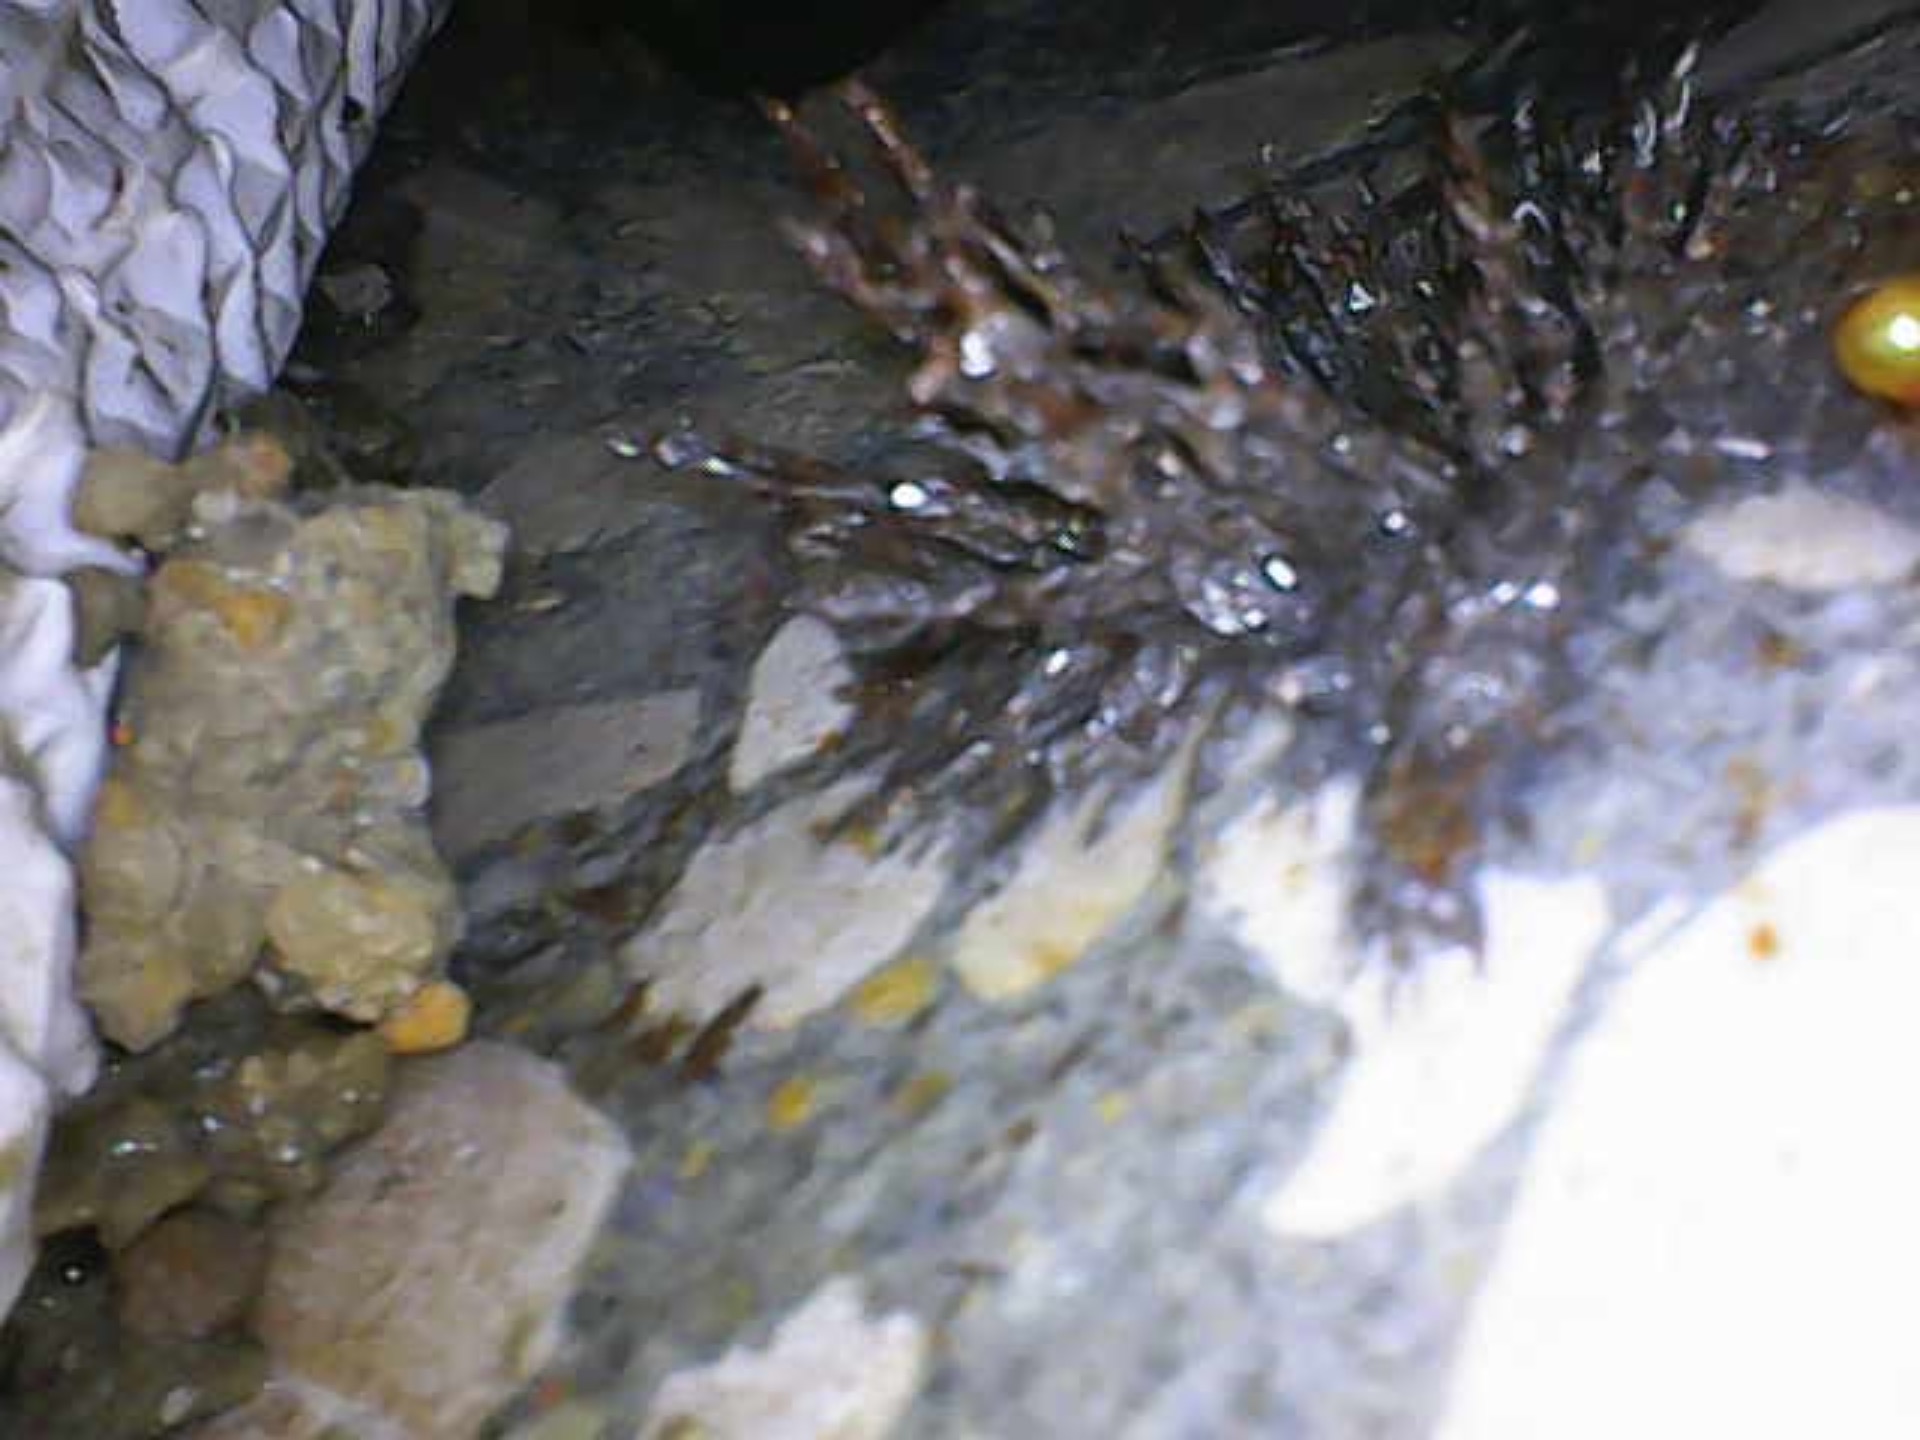
Lime efflorescence
Star-shaped – water ingress
Interpretation of roof ceiling:
• Ceiling type: Solid ceiling ~17 cm (no hollow bodies/ribs visible) – deviates from plans!
• Lime efflorescence: Water ingress due to leaky roof sealing, calcium dissolves from concrete and crystallises
• Long-term risk: reinforcement corrosion if moisture continues to enter
• Measure: Urgent replacement of roof sealing
Load calculation for false ceiling on 1st floor / balconies
according to structural planning (PLANO 300)
| Design loads (planning) | |
| Ceiling type | Hollow core ceiling 16+4 cm (plan-compliant) |
| Total load (planning) | 4.86 – 9.39 kN/m² |
| of which permanent load | 3.86 – 6.39 kN/m² |
| of which live load | 1.00 – 3.00 kN/m² |
| Max. span (garage) | 5.50 m |
| Planned construction (Margres EVOKE Light Grey, tbd) | |
| Margres EVOKE Light Grey (tbd) 60×60×1cm | ~0.23 kN/m² |
| Adhesive/screed | ~0.30 kN/m² |
| Bitumen waterproofing (2 layers) | ~0.15 kN/m² |
| Total structure | ~0.7 kN/m² |
| + Payload (access, wind) | ~1.0 kN/m² |
| Total planned load | ~1.7 kN/m² |
| Reserve vs. design (min. 4.86 kN/m²) | >3 kN/m² ✓ |
📷 Ceiling findings 1st floor / balcony
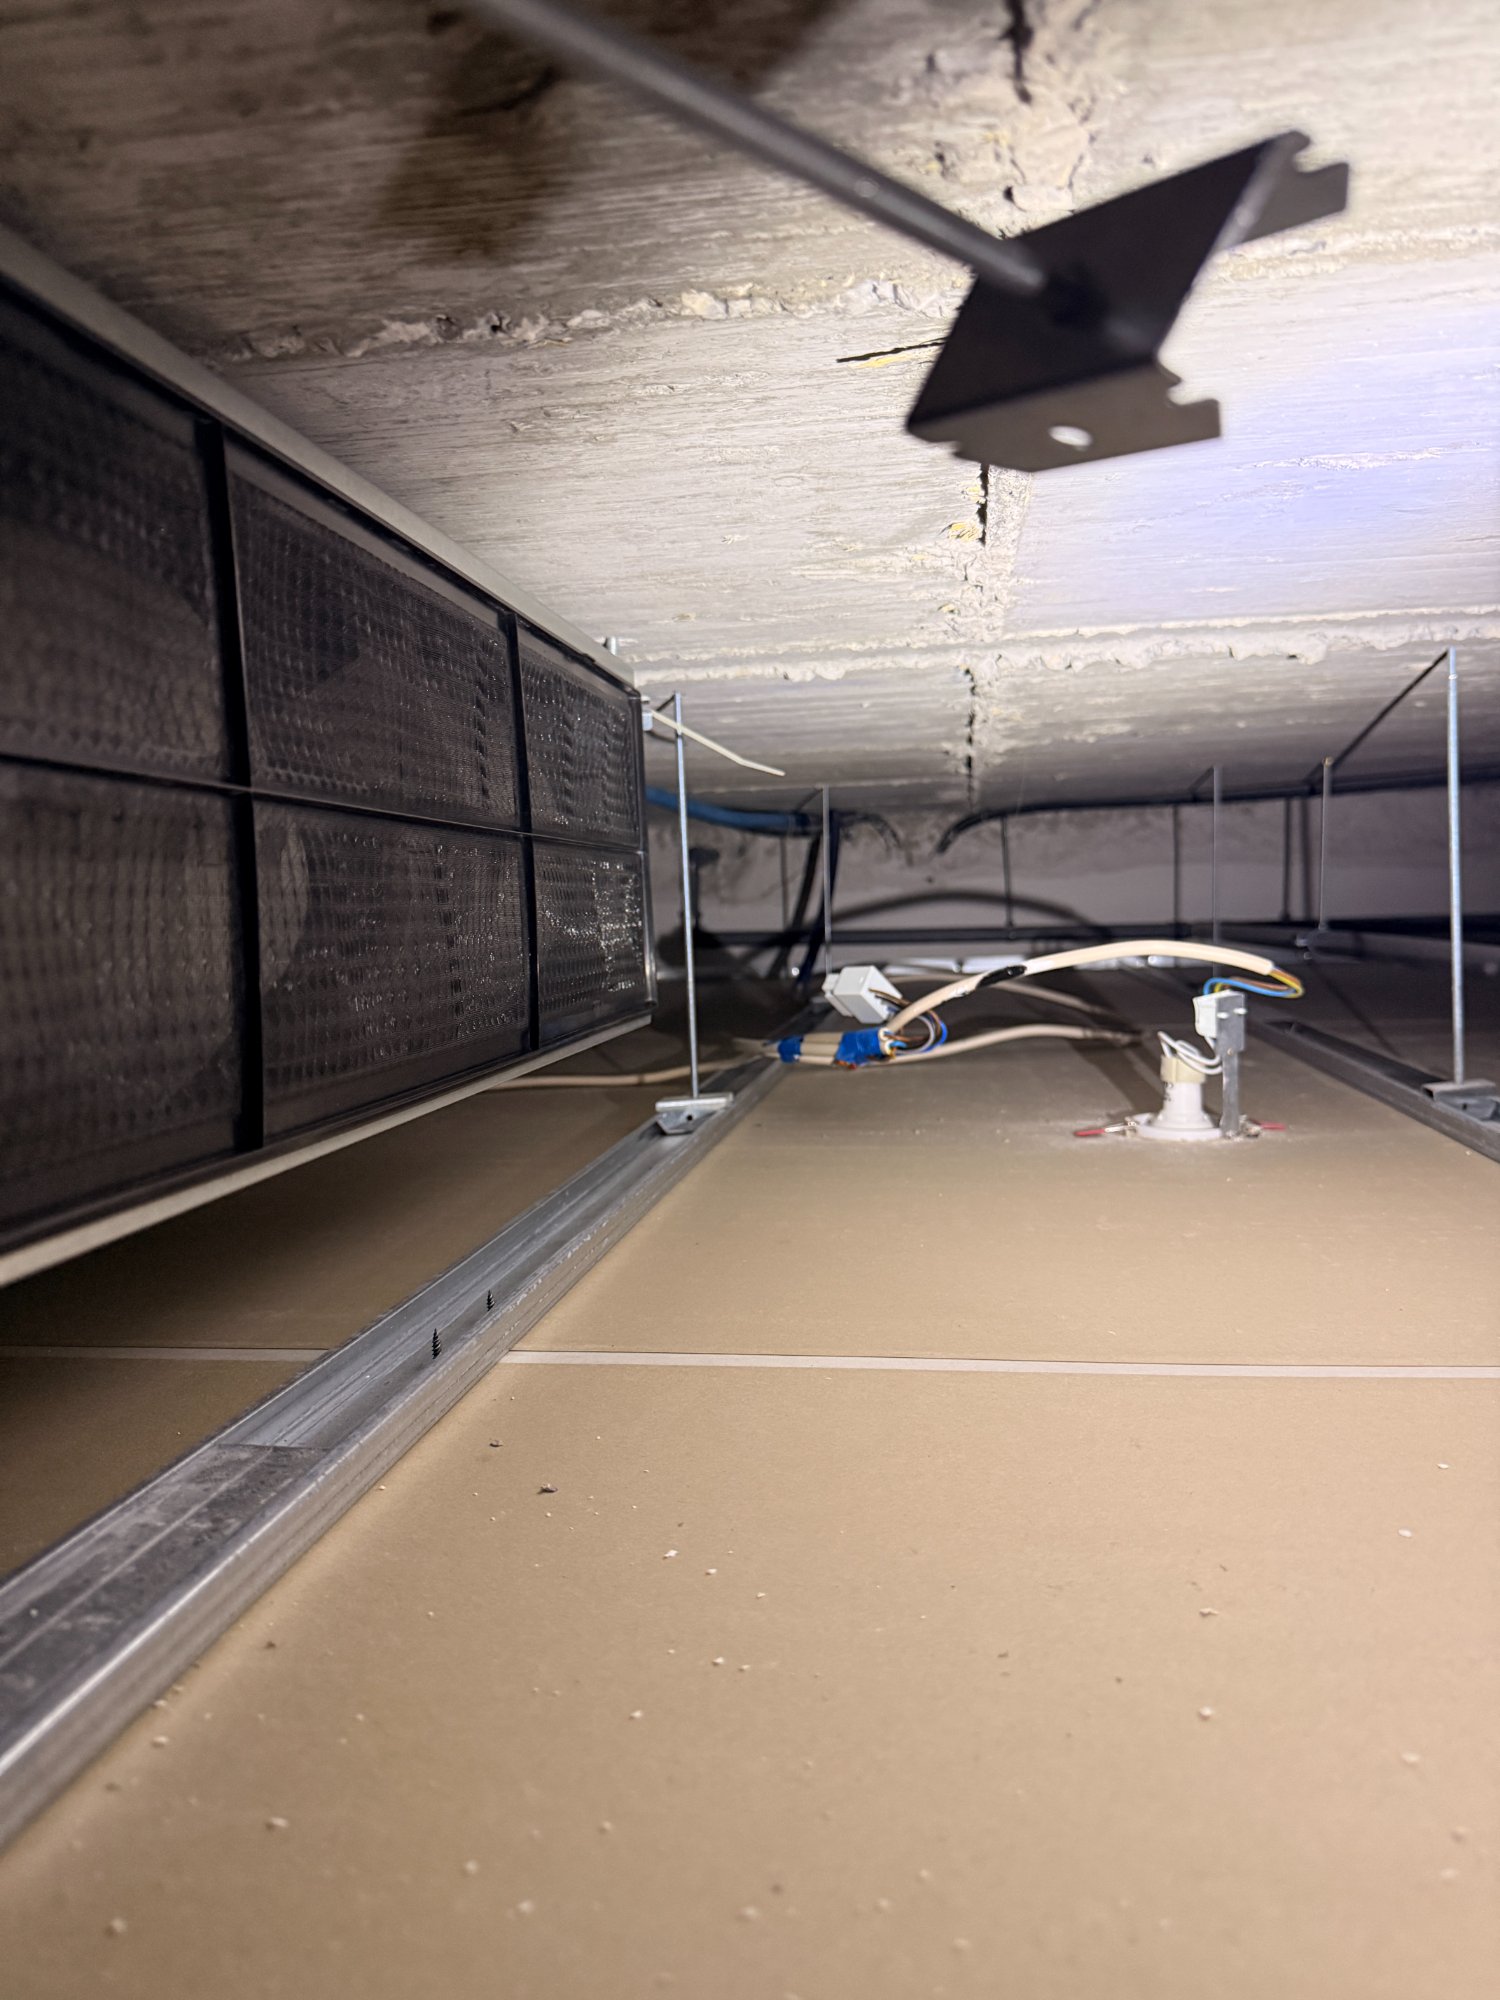
Hollow space in suspended ceiling, 1st floor
Hollow core ceiling with visible ribs – as planned
| Total package (measured in dining room) | 28 cm |
Interpretation 1st floor / balcony:
• Ceiling type: Hollow ceiling (ribs visible) – corresponds to plans (16+4 = 20 cm)
• Structure: ~8 cm (screed, tiles, etc.)
• Ceiling type: Hollow ceiling (ribs visible) – corresponds to plans (16+4 = 20 cm)
• Structure: ~8 cm (screed, tiles, etc.)
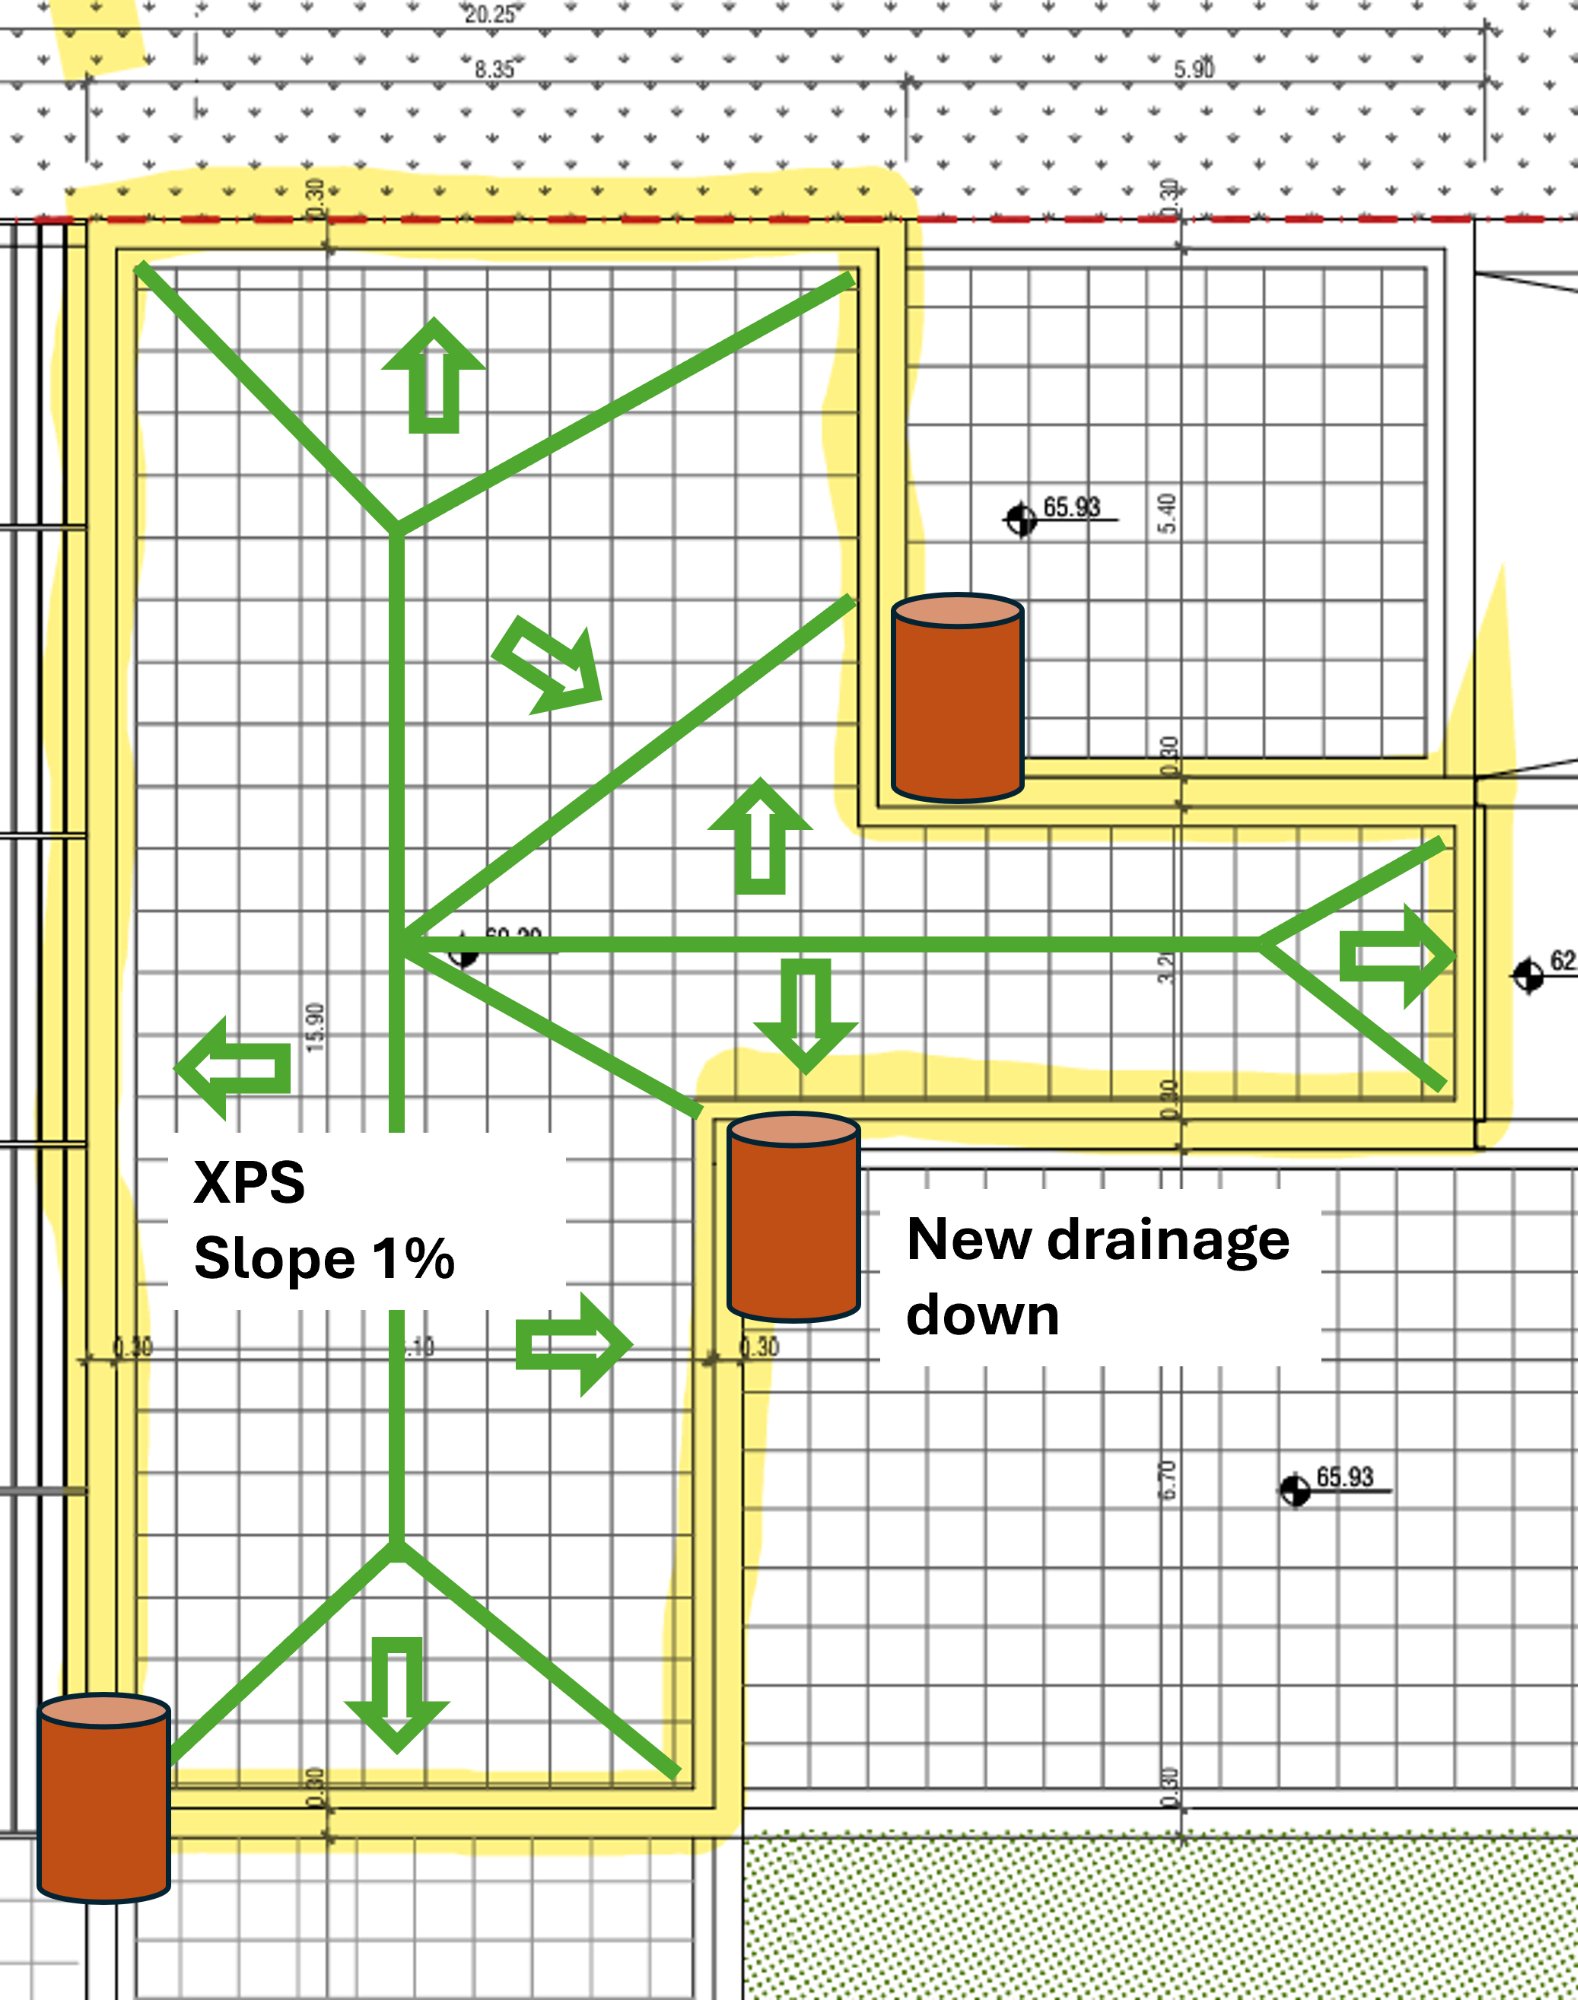
Rainwater drainage (existing according to planning)
| Design area | 490 m |
| Design rainfall | 5-minute event, 10-year recurrence |
| Downpipes | DN 110 |
| Gutter slope (planning) | 2–3 |
| (not implemented as planned) | often no gradient |
| Collecting pipe | DN 160 |
| Max. depth of rain gutters (measured) | 15–20 cm |
ETICS façade (existing according to planning)
Attic connection relevant
| System | ISOVER Clima 34 + Weber.therm |
| Insulation | Mineral wool 60 mm, λ = 0.034 W/(m·K) |
| Reinforcement | Weber.therm Base (polymer mortar) |
| Plaster | Weber.pral Clima (scratch plaster) |
| Masonry | Hollow brick 22 cm |
| U-value | 0.45 – 0.46 W/(m²·K) |
| Total thickness of façade (planning) | ~30 cm |
| Total thickness of façade (measured) | 38 cm |
📷 Wall findings (rod camera via ventilation opening)
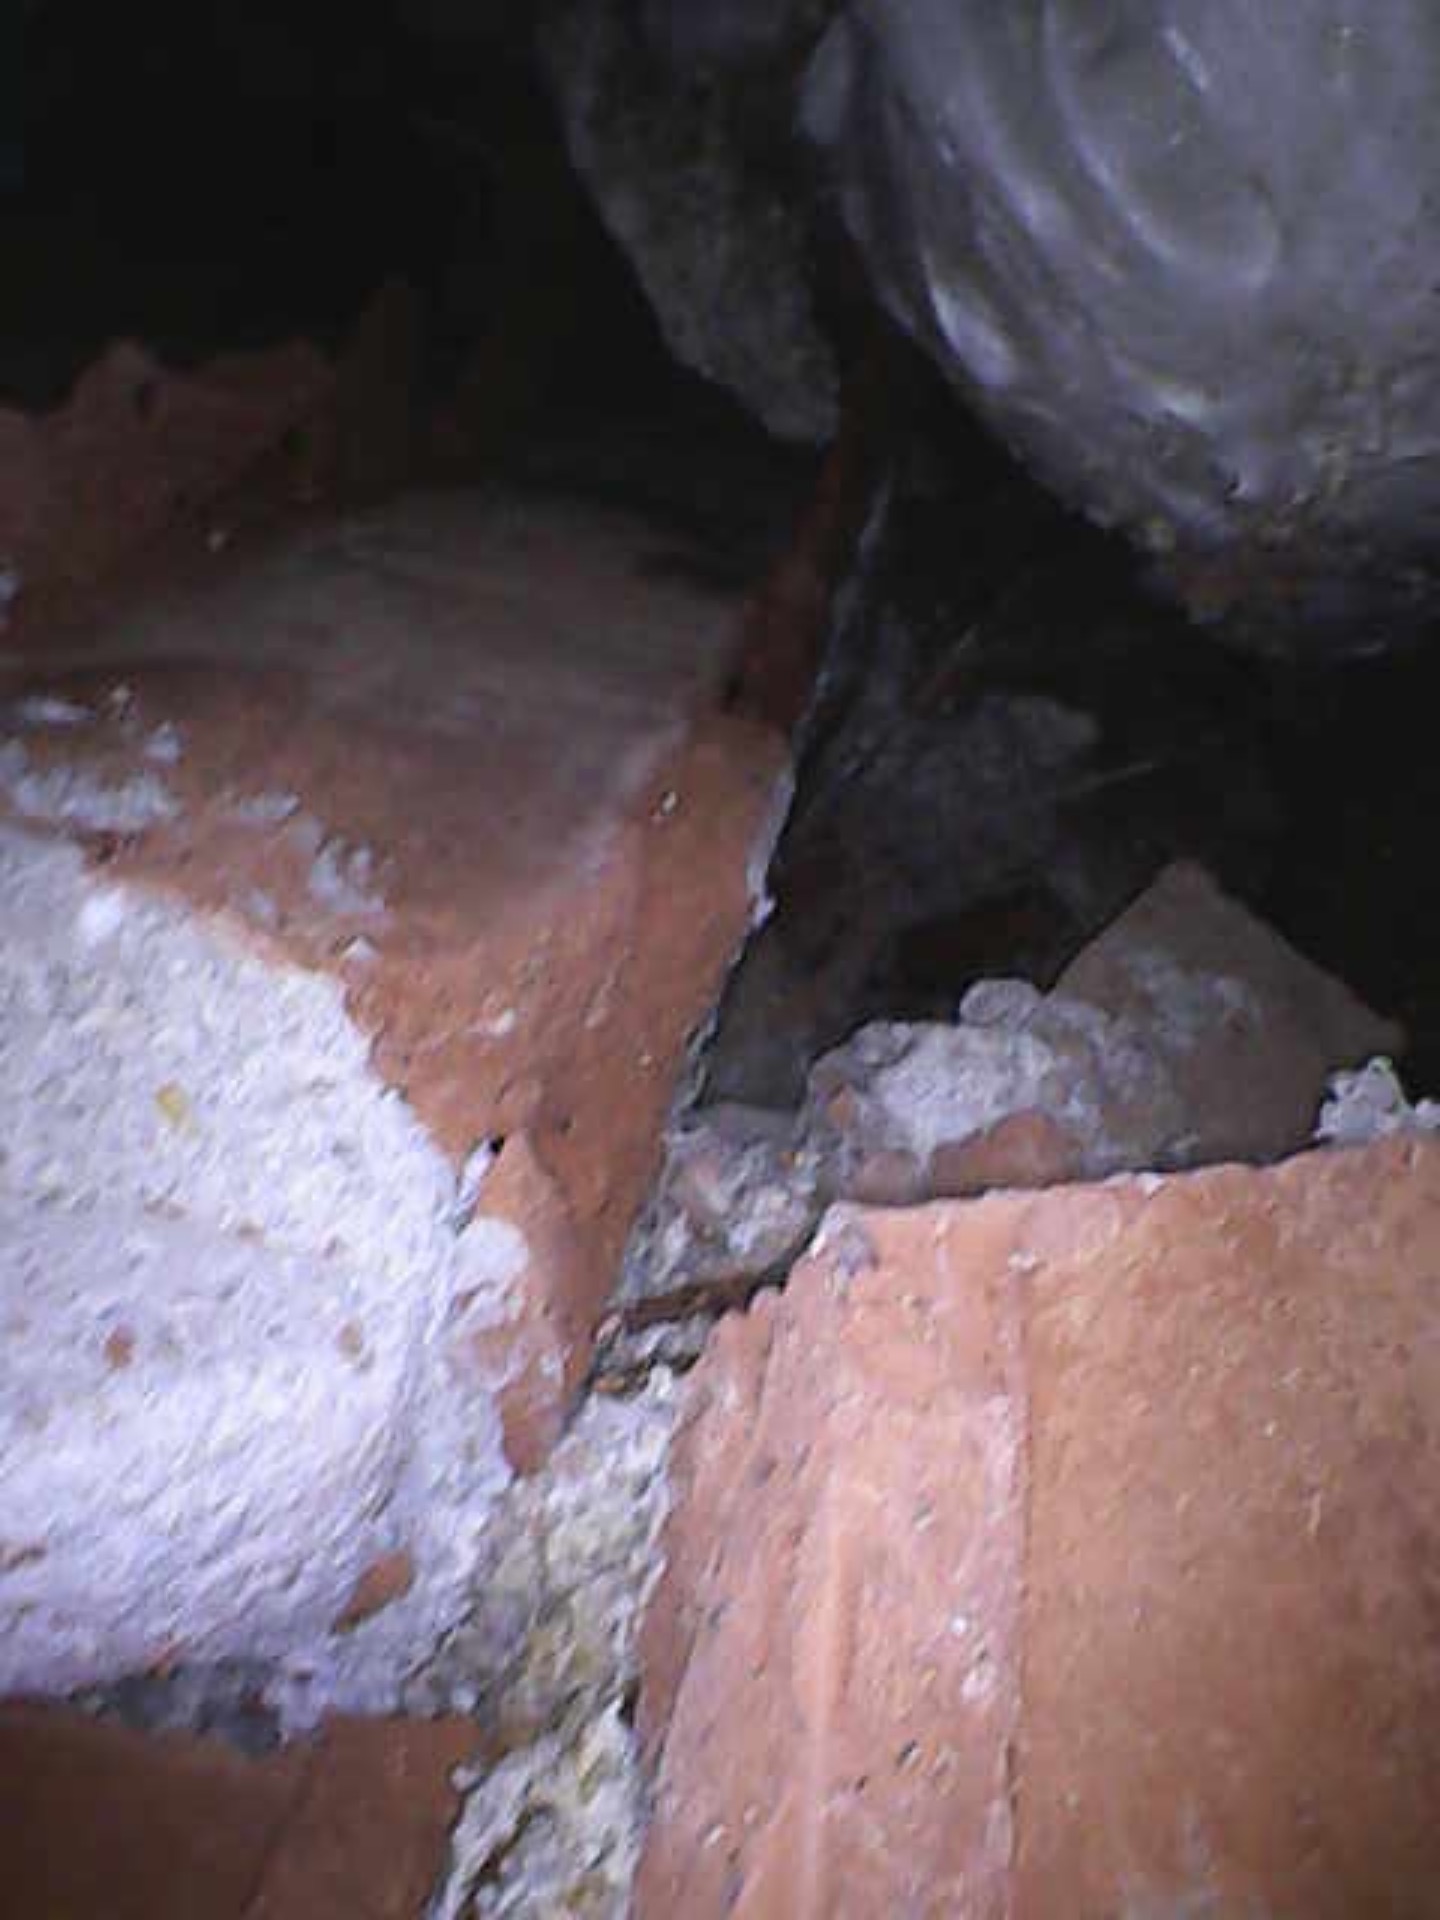
Hollow bricks
Tijolo furado – corresponds to plans
Hollow bricks inside
Efflorescence in joints – water path visible
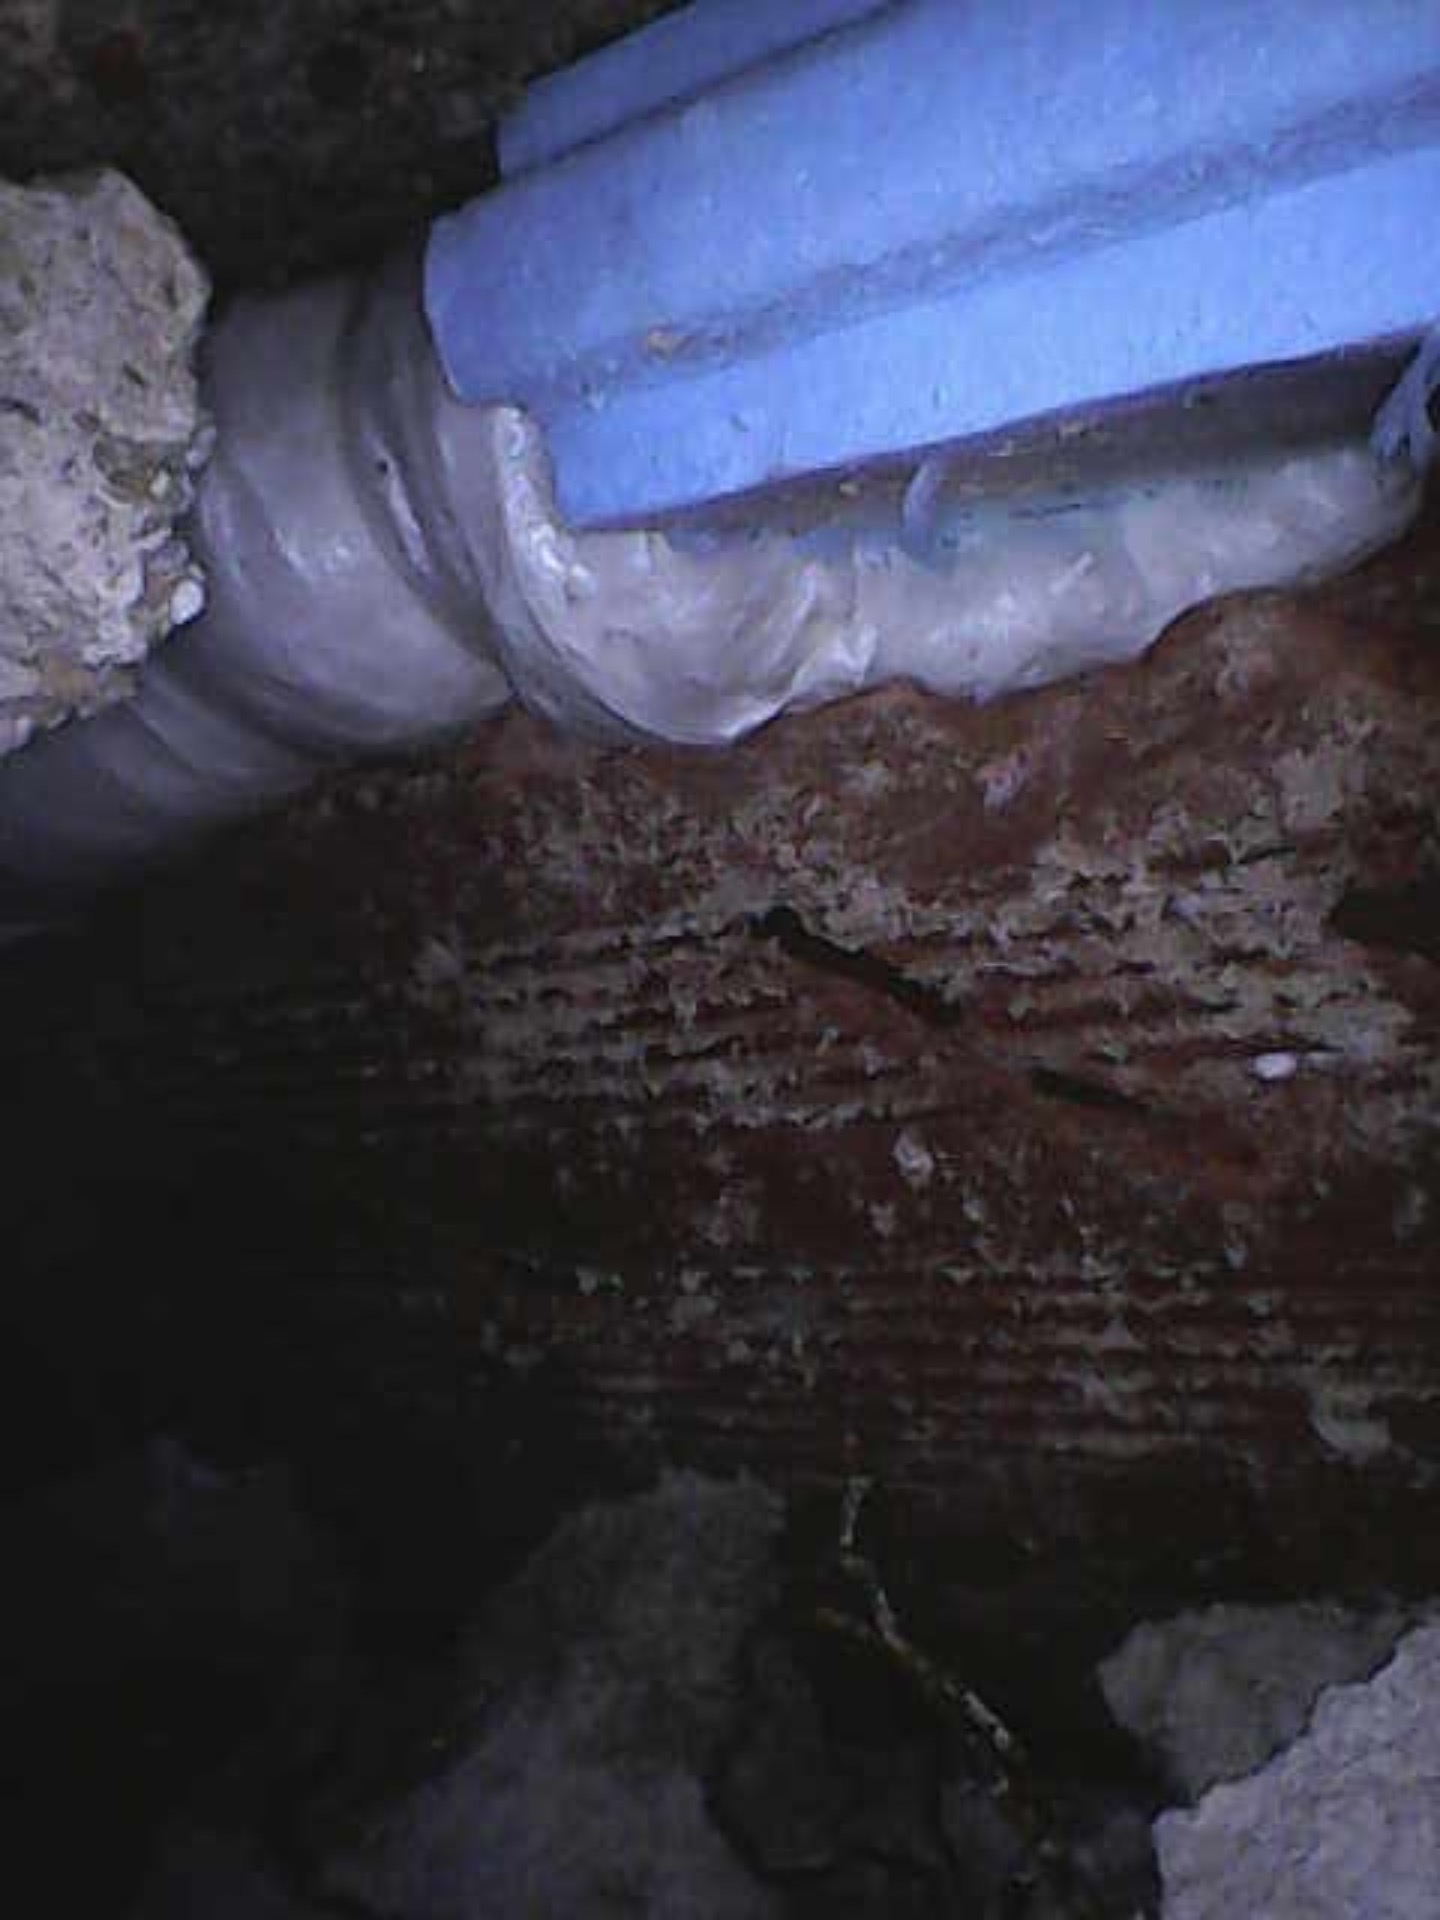
Pipe penetration
XPS insulation, grooved hollow bricks
Efflorescence
Salts due to water ingress
Interpretation of wall findings:
• Masonry: Hollow bricks (Tijolo furado) – corresponds to plans (22 cm)
• Efflorescence in joints: Water seeps through mortar joints, dissolving salts and calcium
• Water path: From leaky roof sealing through masonry downwards
• Condition: Substance intact, but long-term frost damage and plaster detachment possible
Solar (current situation)
| Number of panels | 31 |
| Mounting system | SOLARBLOC® (10°) |
| Number of SOLARBLOC® | approx. 58 |
| SOLARBLOC® dimensions | |
| Floor space | 100 × 21 cm |

Original planning for roof structure (not implemented)
Acoustics project 2017
| # | Layer | Thickness |
|---|---|---|
| 7 | Margres tiles 20×20 cm | 1 cm |
| 6 | Cement mortar | 4 |
| 5 | Polyester geotextile | 0.1 cm |
| 4 | Bitumen LBM(SBS)-40-FP (single layer) | 0.4 cm |
| 3 | Mineral wool (weldable) | 5 cm |
| 2 | Levelling mortar | 4 cm |
| 1 | Expanded clay (slope formation) | 5 |
| 0 | Hollow core slab 16+4 | 20 |
| Planned above raw ceiling | ~19.5 cm | |
| U-value (planned) | 0.49 W/(m²·K) |